@Norm
How do you style the text size in the image using text-label-overlay class?
Can you add the text size option in the interface panel?
@Norm
How do you style the text size in the image using text-label-overlay class?
Can you add the text size option in the interface panel?
Seconding the above.
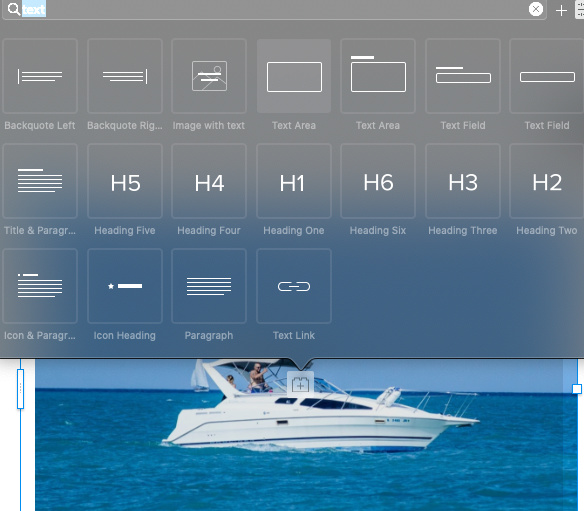
As there seems to be no simple bric for ‘image with caption,’ I’m trying to use the Image Text bric.
Seems to have a bug at the moment as there is no way to select the image, although inspector hover texts ‘click to select image’ and nothing happens.
Beyond that, text placement is pretty important and should be a basic control/option in the inspector, IMO.
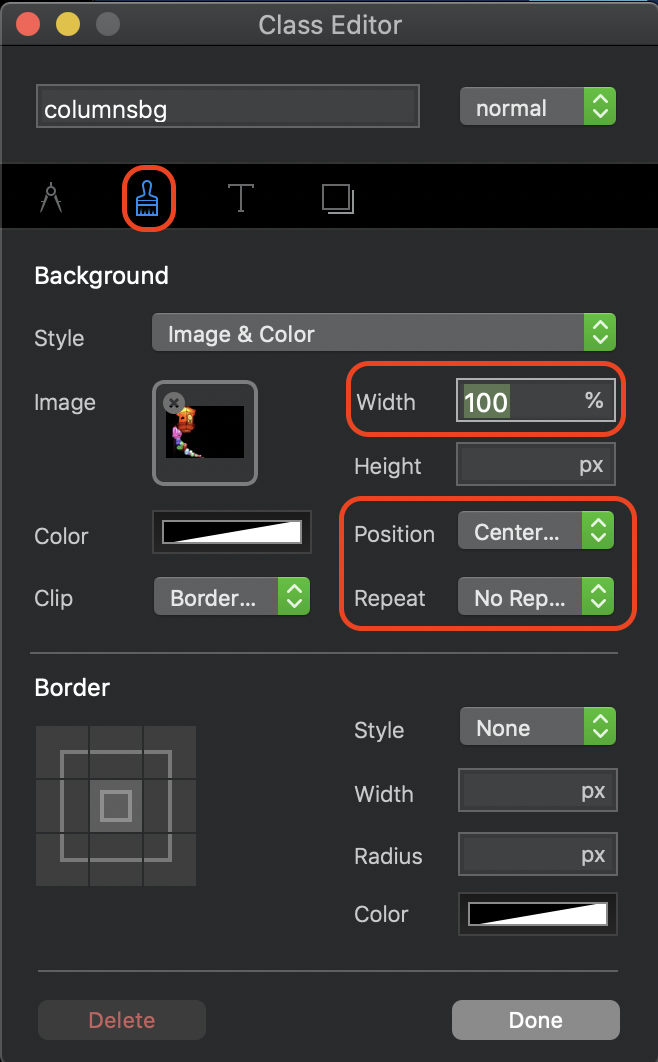
It may be easier to simply add your image as a background image to its containing column. Just select the column and create a custom class. In the class editor add your image as the background and then adjust the width of the image to 100% so that the image fills it completely. Ensure the image is set to centre-centre and no repeat. Switch to the metrics tab and adjust the height slider so that the column height accommodates the image.
You will now have the image placed on the page and you can add a text brick over the image.
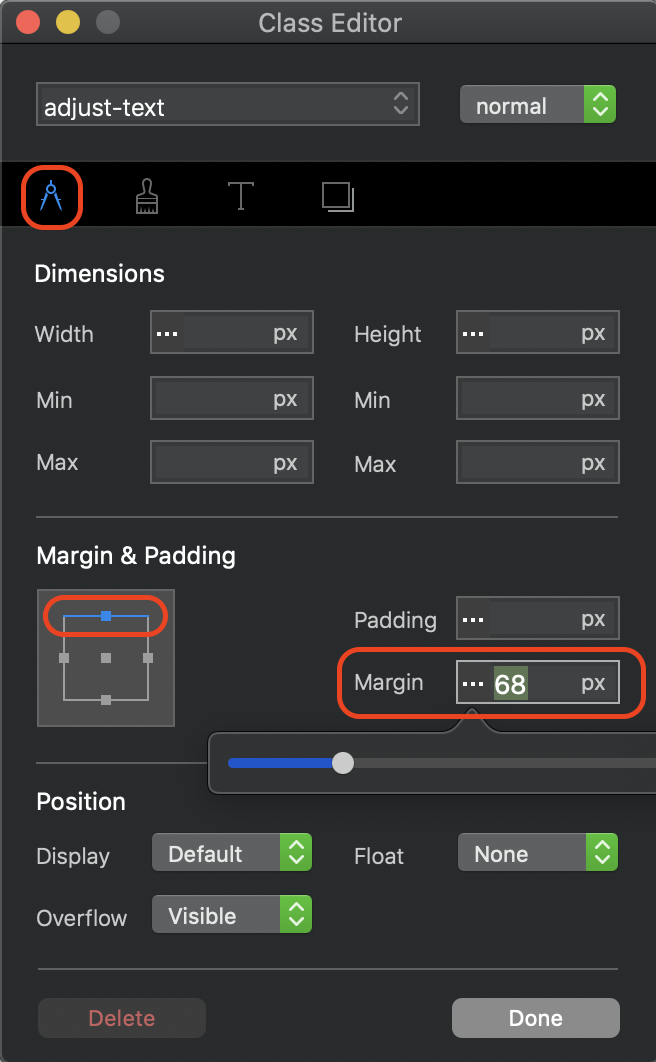
Edit the text and style it how you want -including alignment. If you want to move the text either left or right, create a new custom class to do this. In my example, I wanted my text to be aligned to the right of the image and remaining in the black area. This is the custom class I applied to the text.
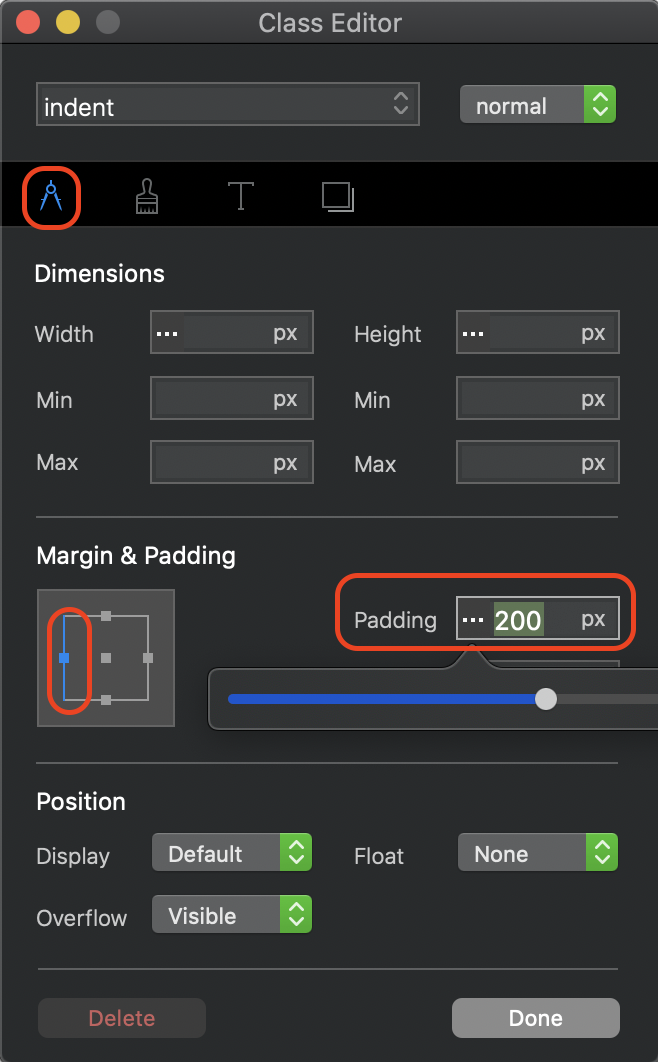
Finally, I wanted to ensure that my text was aligned vertically centred so I created another custom class as follows:
Now that you have three custom classes assigned to the elements, you can switch to each breakpoint and adjust them to better suit the various device screens . Start by adjusting the class applied to the column to ensure that its height is adjusted to the size of the image at each breakpoint. Then select the text classes and adjust them to position the text exactly where you want.
By the way, if you want to make the whole thing into a clickable element (a link) just select your text and make it into a link. Then, with the text link selected, apply the class .stretched-link. Whenever someone clicks anywhere in the column, the link will be activated.
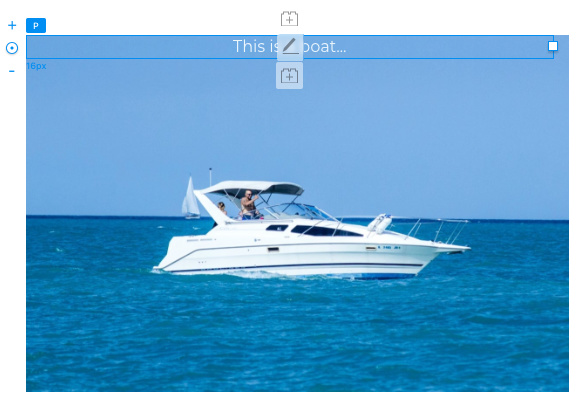
Here is the end result:
@hendon52 Still going through your reply, but just wanted to say - thank you very much. Forums(not blocs specific -many) all too often have a bunch of single line not-so-helpful responses, but your response step by step was both unexpected but also very appreciated.
Would give multiple likes if I could.
I think you will find most members of the Blocs community will give quite detailed help and assistance. We’ve all been there and most of us know that a simple step-by-step gets us back on track far more quickly than dragging out a thread with small snippets of information. Enjoy your Blocs and come back often if you need help. Anyway, feedback is always welcome - thanks.
Ok, this part is OK, although this seems to imply a custom class for each and every image used across a site, as a result of Image with text bring limited and Image w/caption not existing? This is a good solution for 1-2 images but this will be problematic/not ideal when dealing with a site with many images across pages… ?
Are you adding the ‘text brick’ as a text area, paragraph or am I missing something?
Trying with a paragraph added, added custom class sg-caption. Blocs seems to have some bugs, as at several points, just changing the class attributes (e.g. font color) led to completely invisible text instead of the color selected…removed the class from the paragraph and added back seemed to correct, but I’m not seeing how I could pin or add this at the bottom?
Good tip on the .stretched-link, thanks!
I’m not sure this helps me solve “I need multiple images across my side, which all have captions that are clickable”, without doing a custom class for each image? …but undoubtedly will help as I do other things on the sites…
If all your images are of the same size (i.e. all using the same column width) You should be able to use the same classes on the images and the text. Where the quantity of text or image aspect ratios differ from image to image, you will have to duplicate the classes. You can do that in the class manager. You then apply the duplicate classes to the next image and adjust the classes as normal.
The key to getting the design right is to try and make sure that all your images are the same aspect ratio. And that the images are all being placed at the same size. This not only looks better from a design perspective, but also means that one of the classes (the one defining the background image and column dimensions) can be applied to all similar image elements. With the text overlay element, you will probably use duplicates classes as the content will vary from one image to another.
@hendon52 I’m just not seeing how you were positioning the text anything other than at the top or bottom of the section? Were you using paragraph or ?
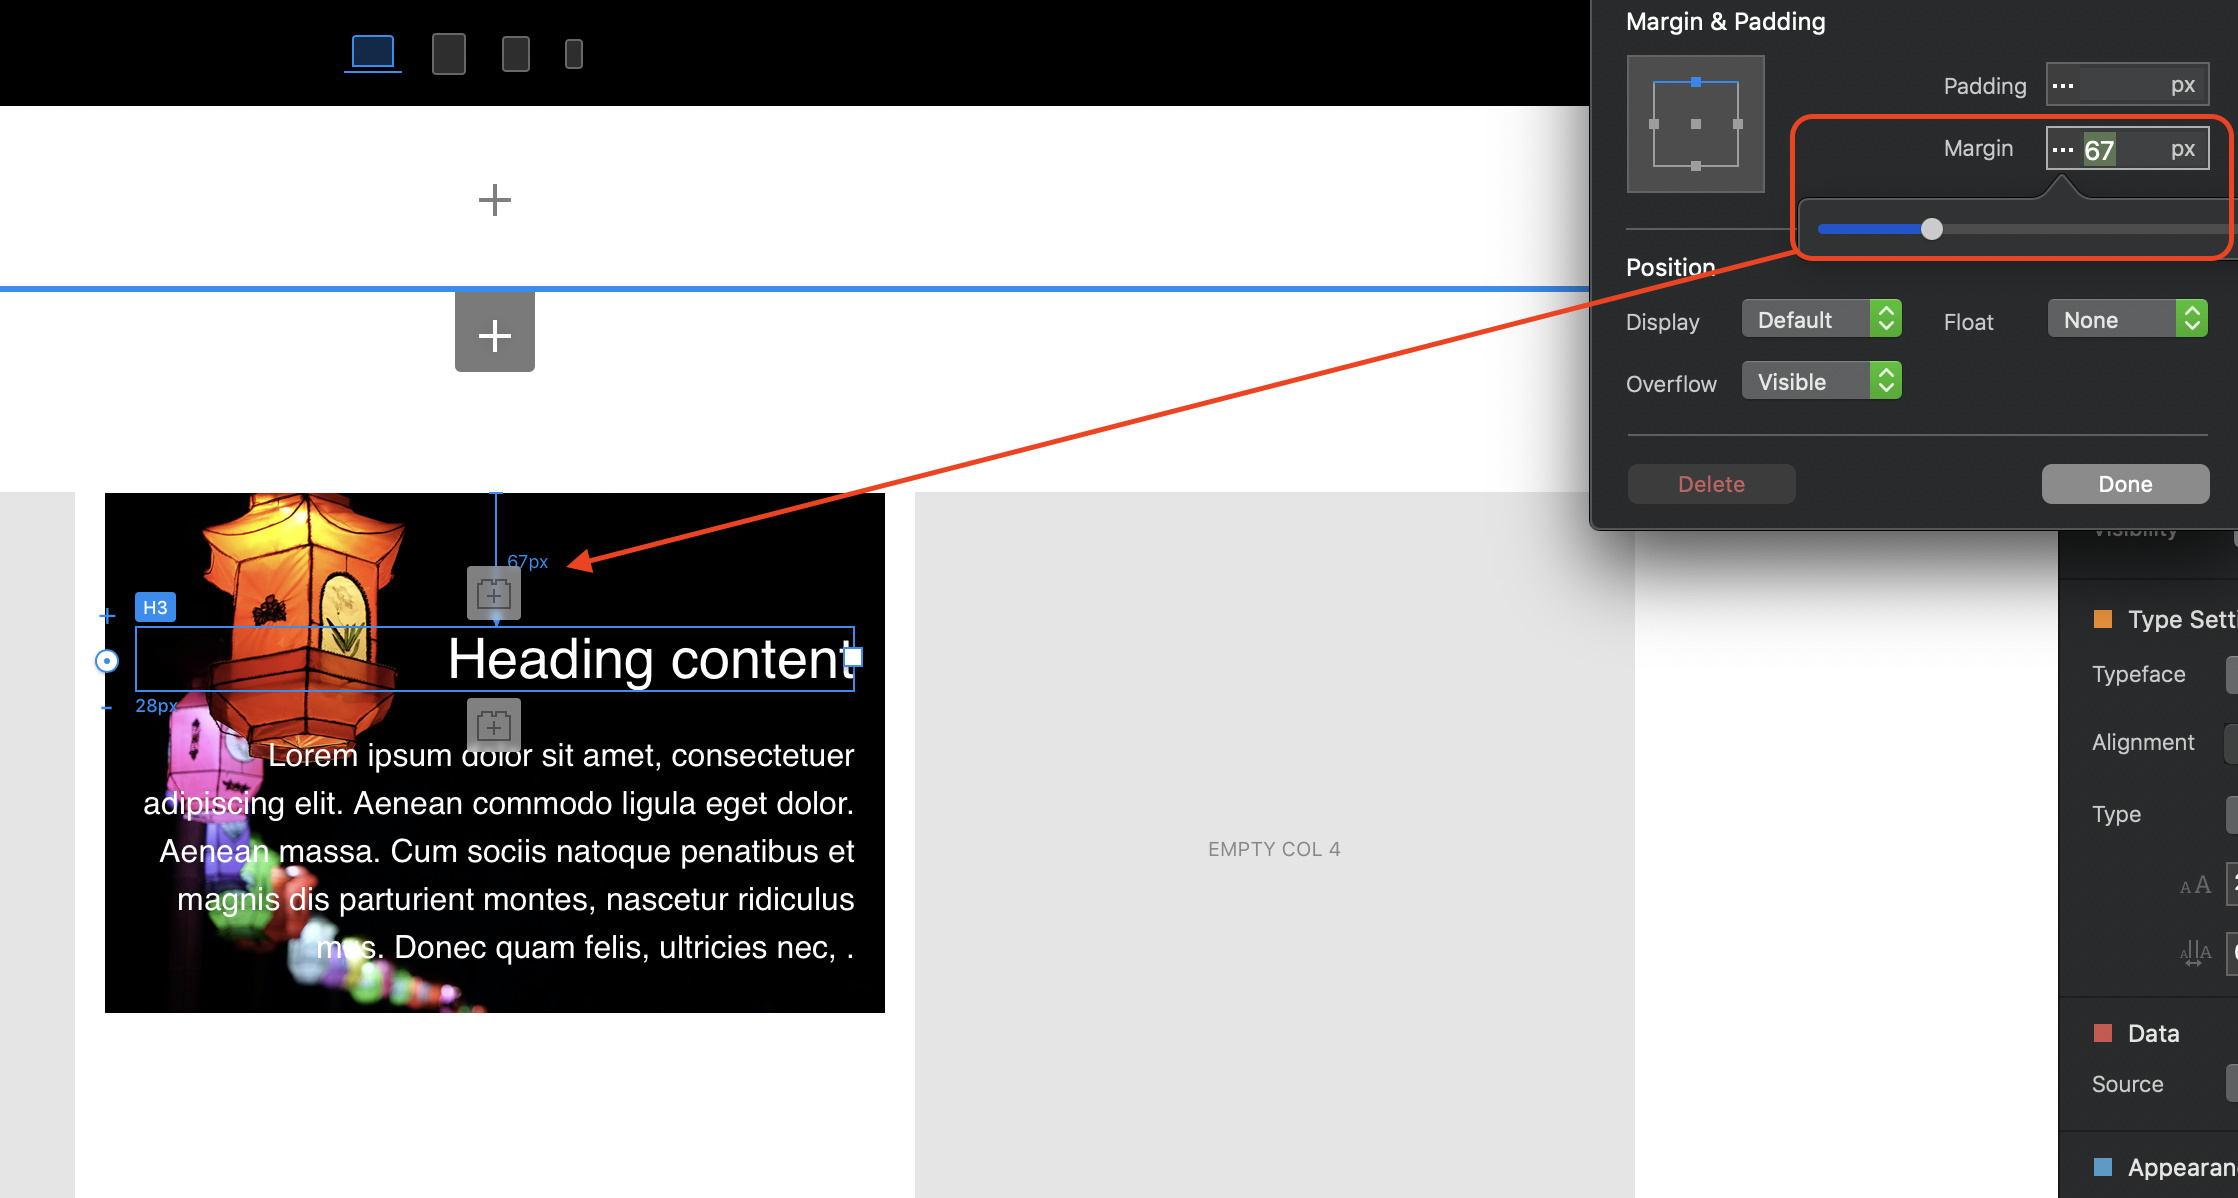
I used the Paragraph with heading bric. It’s actually got two text boxes - one is the heading, the other the paragraph text. The bric does align to the top of the column and hence the top of the image when it is placed. To move it down to align the text vertically, I just selected the heading part of the bric and applied the adjust-text class as shown in the instructions above. Select the top margin and adjust the margin slider to visually align the text. Notice that the paragraph text goes along for the ride because it sits directly under the heading text so it gets pushed down when the heading is adjusted.
You can also position the text by using flex.
d-flex to the columnaligned-self-center will centre the text.Done!
Its well worth learning Flex. You can place the text at the top or bottom using
align-self-start or align-self-end
eg.
@PeteSharp . I wanted to watch your video above but it seems to be gone. Is it still around where you could post a link to the video?
Thanks
After a while I clear out my Dropbox and those videos are deleted.
But I did a video a while ago on flex when Blocs 4 came out.
Will be great to see more video tutorials on your youtube channel 
As you can appreciate @kwakukwaku i can only make them in my spare time. So it’s family / work dependant.
But always open to video requests too.