Excellent - I understood that, seeing all of the words I could understand, it’s bits like data(), data-section etc. I haven’t the first clue about what they mean or do!
Hi @Norm
This works great ! Thank you ! - now one HUGE thing to finish it off ! - how is the best way to add an image for mobile?
When I add an image it overrides the video on the other breakpoints, and if I create a class and add an image on mobile only - this doesn’t work either.
Would creating another Bloc and have it only show on mobile and on the video bloc have it on larger breakpoints?
You should be able to just add a class to the bloc and then apply an image via that class on a lower breakpoint.
That is truly remarkable for an ‘out of the box’ solution, no extra plugins required, very impressed with all this capability, thanks for sharing.
1 Like
Thanks @Norm - I did try this earlier and couldn’t get it to work…but it has worked this time ! (I must have been messing around too much !!!)
Norm - this is an absolute game changer for web design! - still trying to get my head around it all!! and it makes total sense in what you have done on this.
Thank you !
3 Likes
Hiya @Norm just disecting your example file. The custom interaction is in the Interaction menu but I can’t see it being assigned to a Bloc or the page. Am I right in thinking if it is defined in the Interactions Menu it is ready to go and run and doesn’t actually need to be assigned to anything to start on page load? Or am I missing something and it has to be assigned to an element to run. If it doesn’t need to be assigned I’m seeing a number of opportunities for interesting stuff to be done. Thanks
The interaction is assigned on the page load in page settings.
Custom Interactions need to be assigned, they don’t just run if they exist.
3 Likes
Great, thanks I’ll look for that now. Edit: Ah yes, I get now, thanks again.
2 Likes
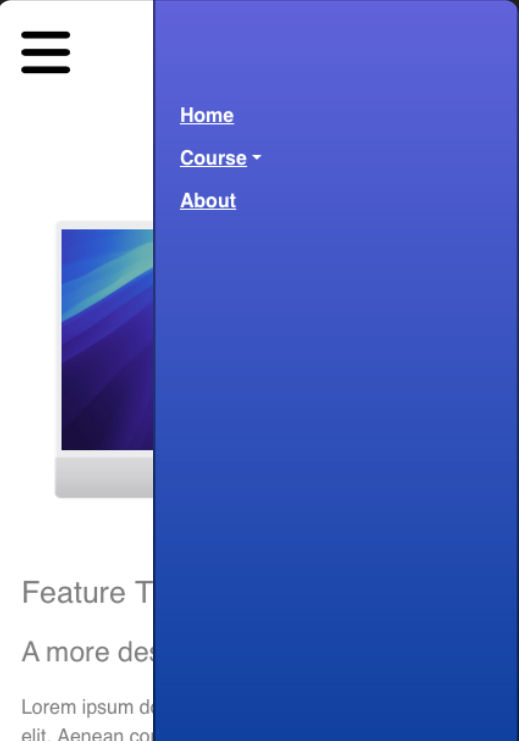
I have attempted an interaction for creating a fly in side menu for mobile.

First I added a Navigation Bloc from the blocs menu.
I then used the menu Manager to create a few options in the menu.
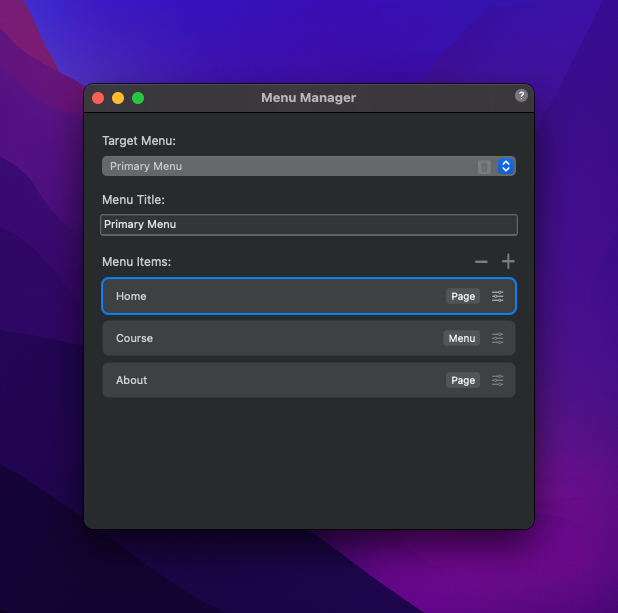
I also created a second menu linked to the ‘Course’ option. The reason for this was that I remember people having problems with the current built in side menu, not showing the secondary menu’s.

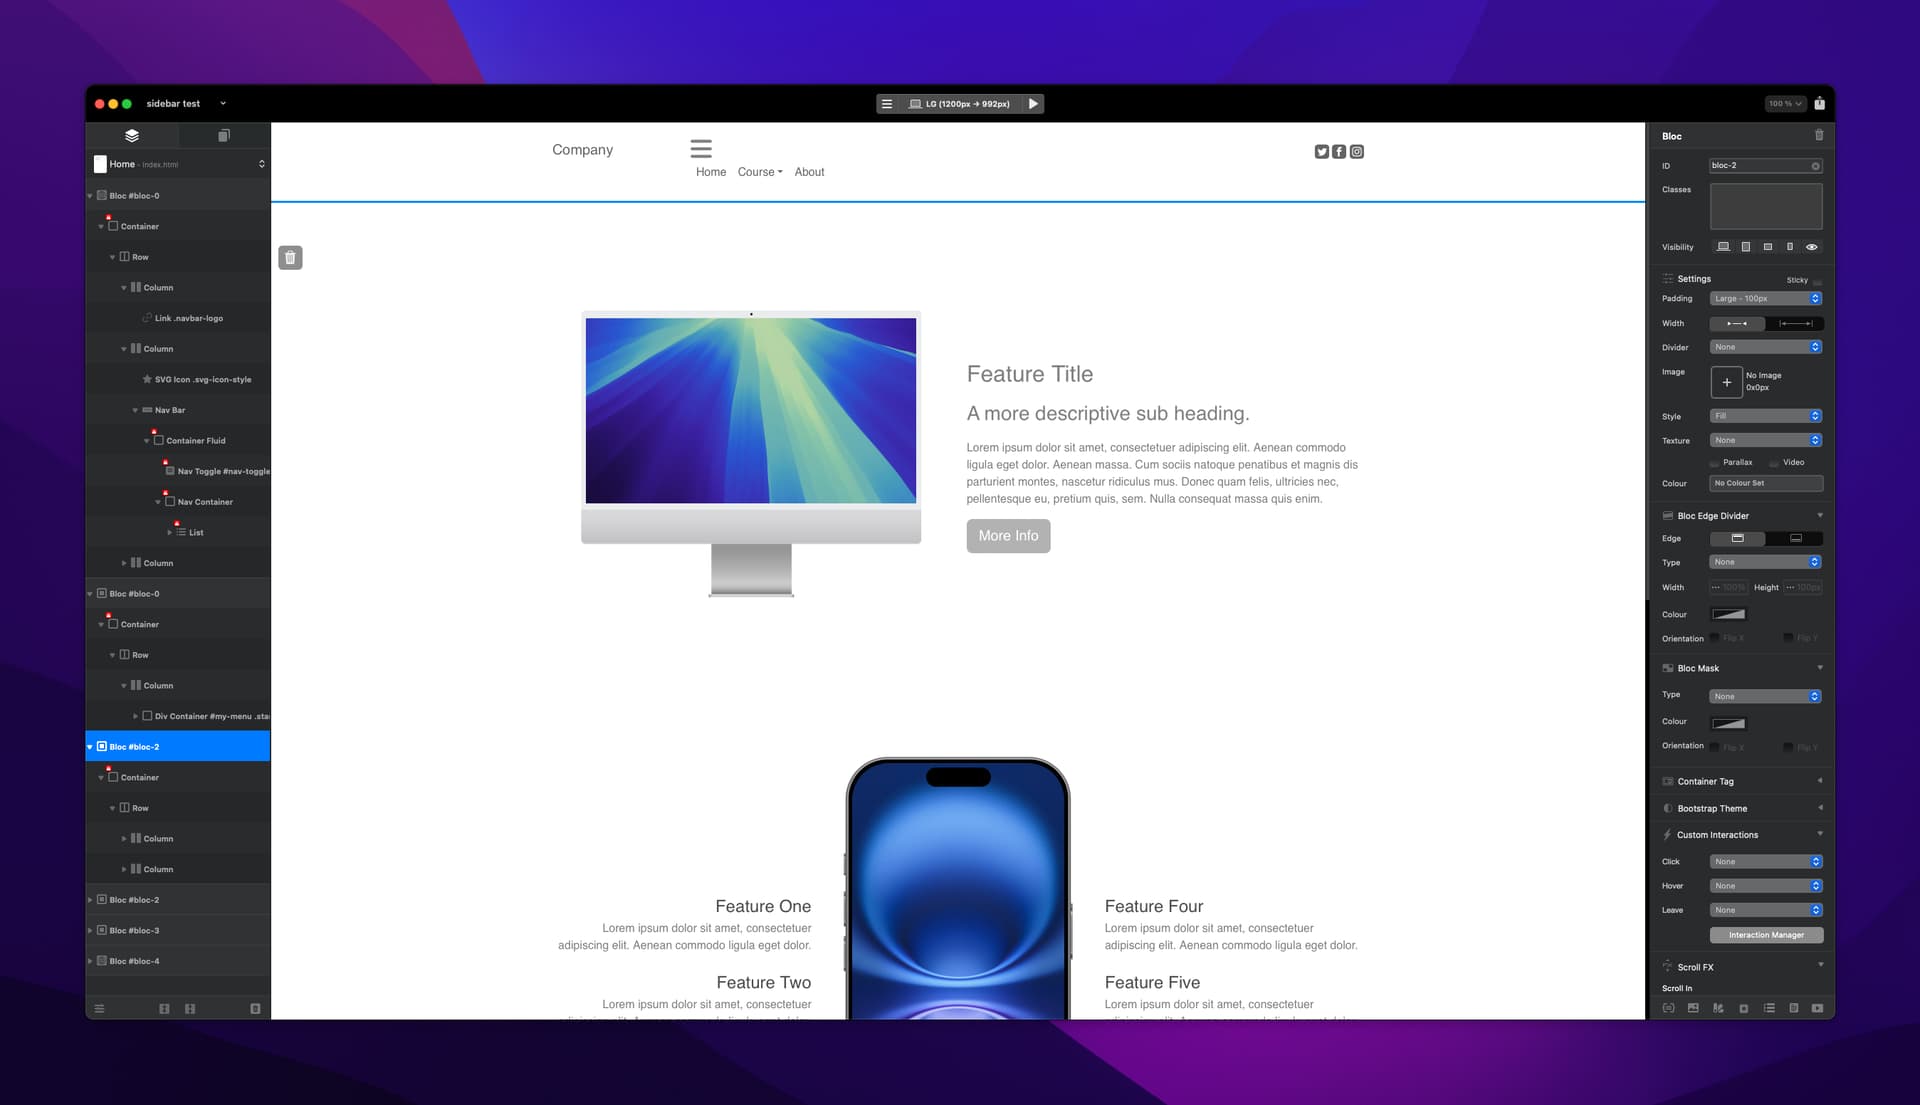
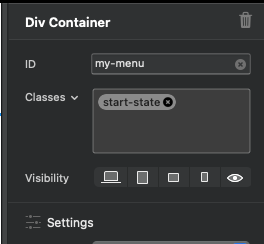
I then added a 1 column bloc & a Div Container bric to the main center bloc and gave the div container an ID ‘my-menu’.
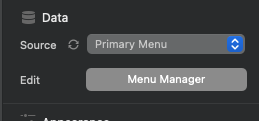
Inside the Div Container I added a List Bric and in the settings menu on the right hand side I selected the Data - Source as Primary Menu. (this means my list bric will be populated by the items from the menu manager, so if I update my menu using the menu manager, my list bric will auto update)
Next I added a class to my div container called ‘start-state’. (This will be how my menu appears when its not active.
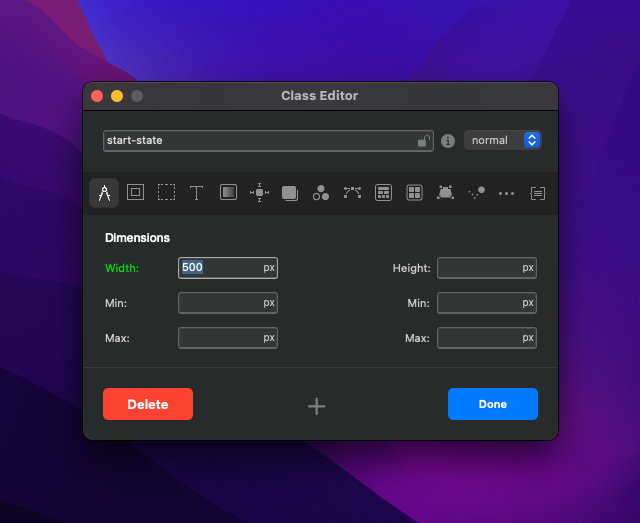
Added a width of 500px.
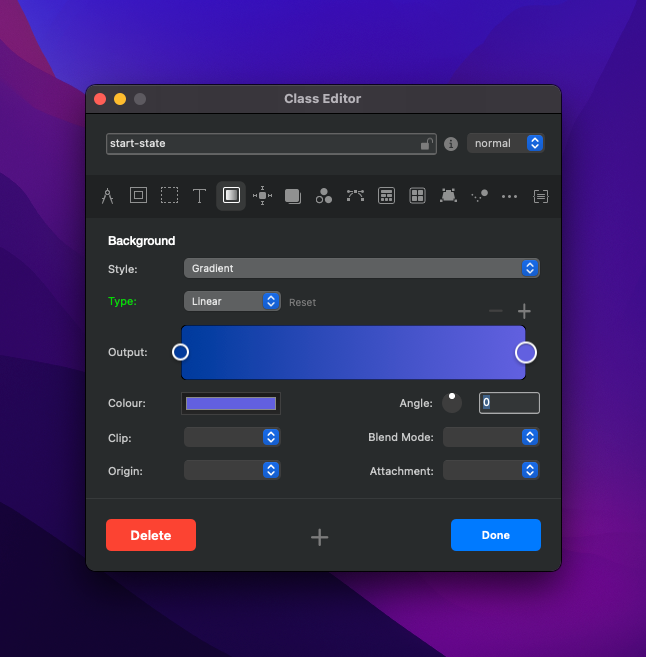
Gave my menu a colour (I chose a gradient)
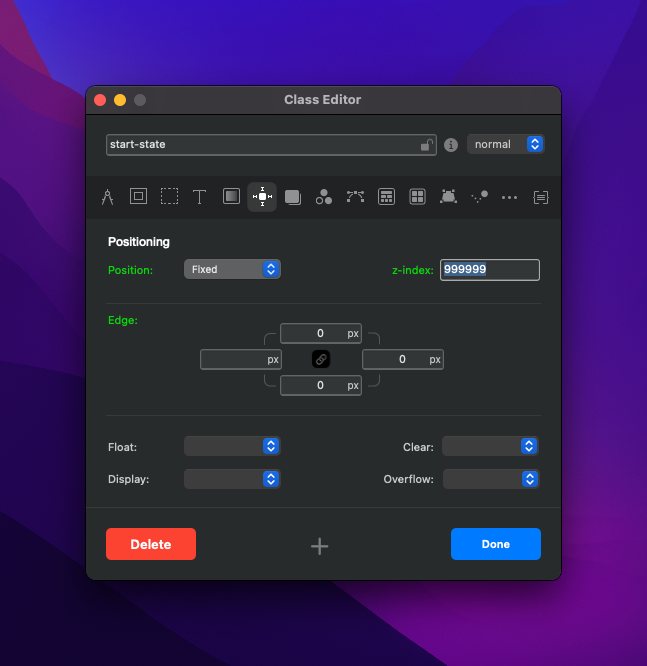
I changed the positioning to fixed and added a z-index of 999999 (this is to make sure it has the highest value of all elements on my canvas, so it appears ontop of everything), also made the top, right and bottom edge as 0.
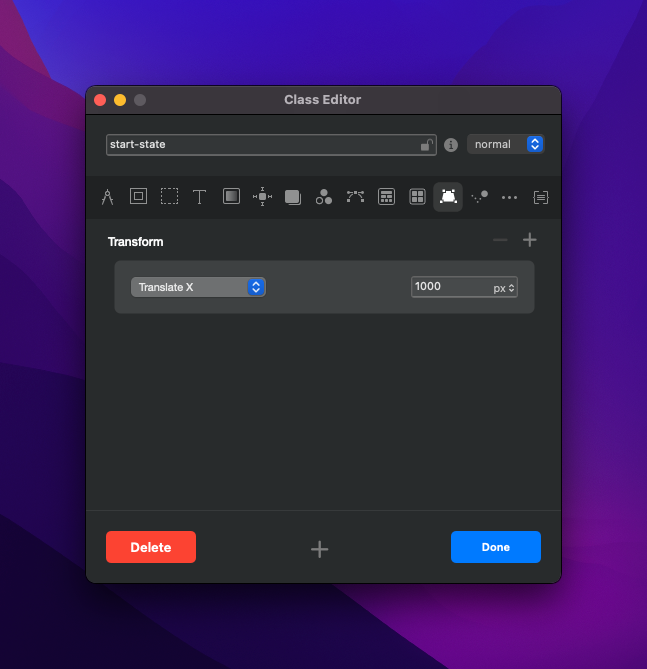
I then added ‘Translate X’ with a value of 1000px. This makes sure the menu stays off the canvas to the right. If i were to change it to a minus value, it would place it off the the left, so this could be used if you want the menu to fly in from the left rather than right.
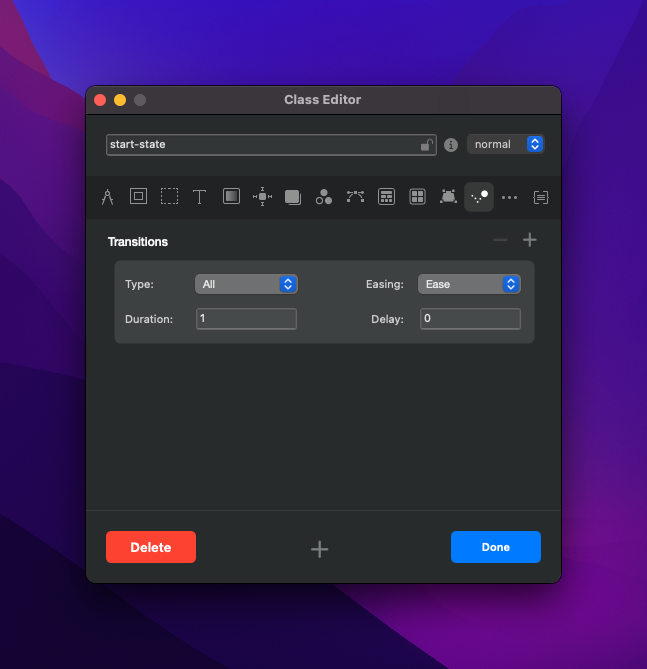
On the transitions I added an ease and a duration of 1. This means when the menu is closed it will take a duration of 1 to fly off the screen and the ease will make it look smooth rather than robotic. If i chnage the duration to more, it will take longer to fly off screen.
Now to add a class that will allow menu to fly in. In the class manager add a new class (this class, doesnt need to be linked to anything). Call this class show-my-menu.

Ive kept the width of the menu the same, 300px. but added a min height of 110% so that the menu stretches the full length of the screen.
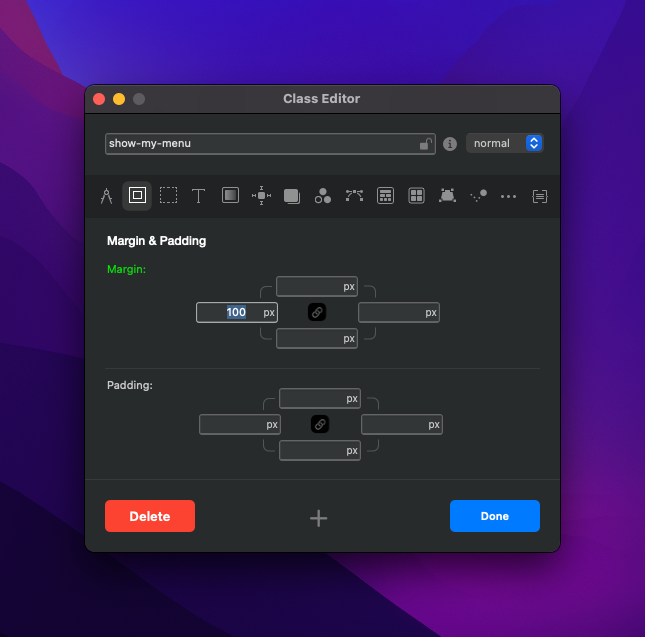
I added a left margin of 100px.
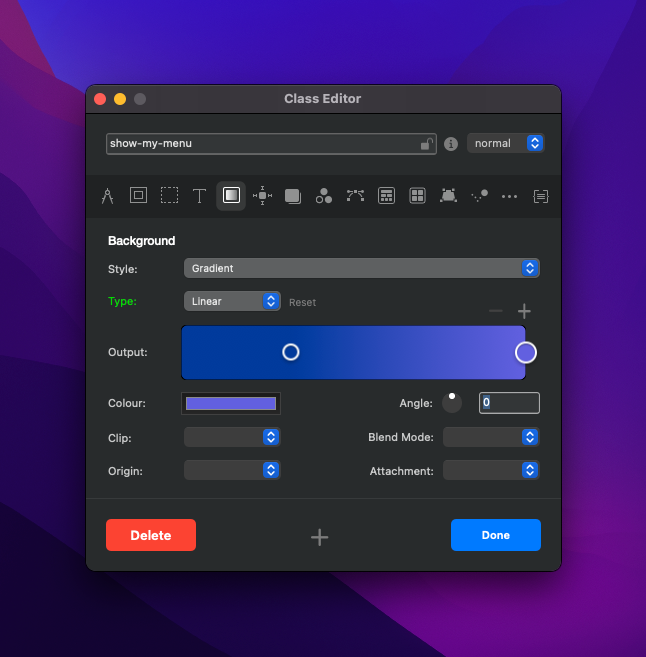
added the same gradient for the menu color.
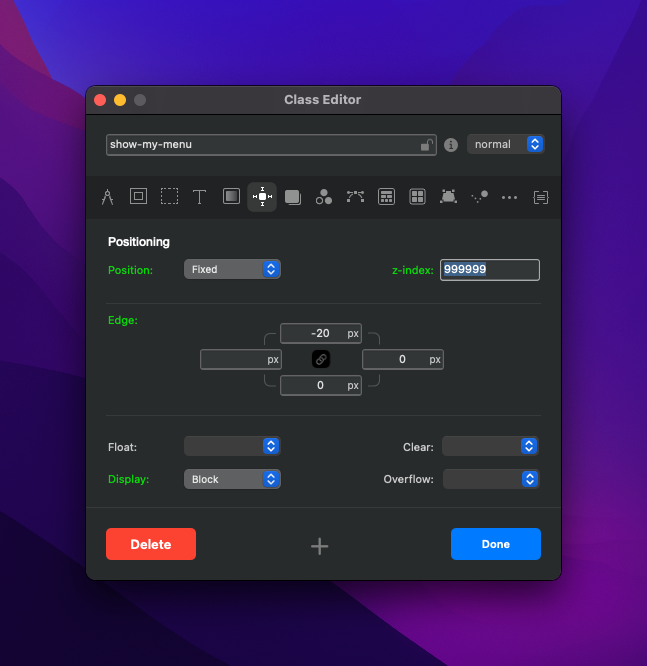
I haved added the position as fixed, the z-index the same and display as a Block. I’ve also added a top edge of -20 px, so that the menu is aligned to the top of the screen and the right and bottom edge are set to 0.

This time Ive added the Translate X as 0px. This means it will stop at 0 px, once it slides in, This covers about 70% of the screen. Play around with this to see how much you want the menu to cover.
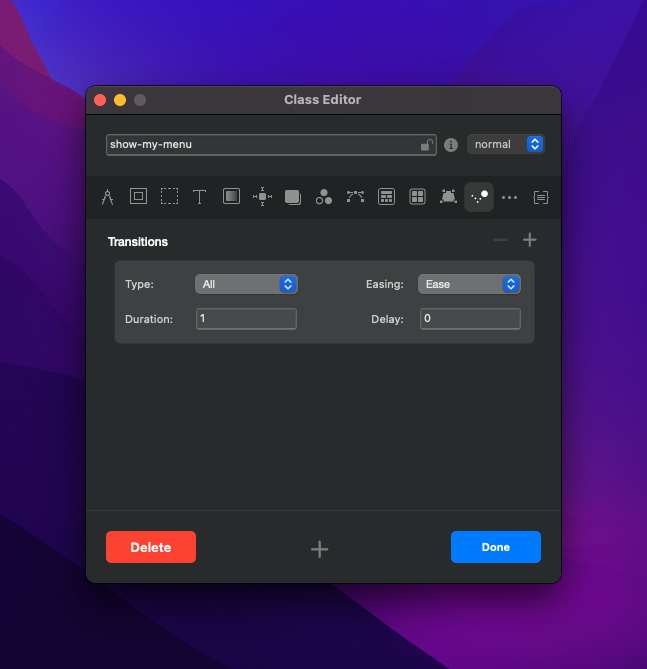
Again I’ve added a smooth movmenent and duration for the menu flying in (rather than flying out which we added in the previous class).
Now we have the menu built, we need a trigger and an interaction. Open the interaction manager.
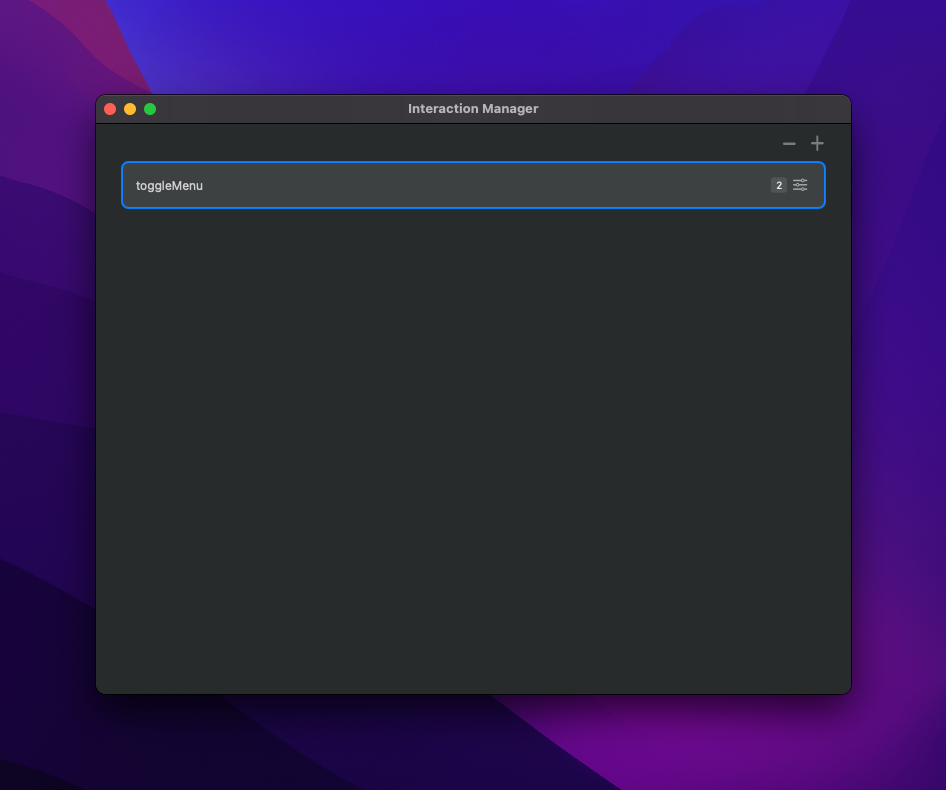
I created an interaction called toggleMenu.
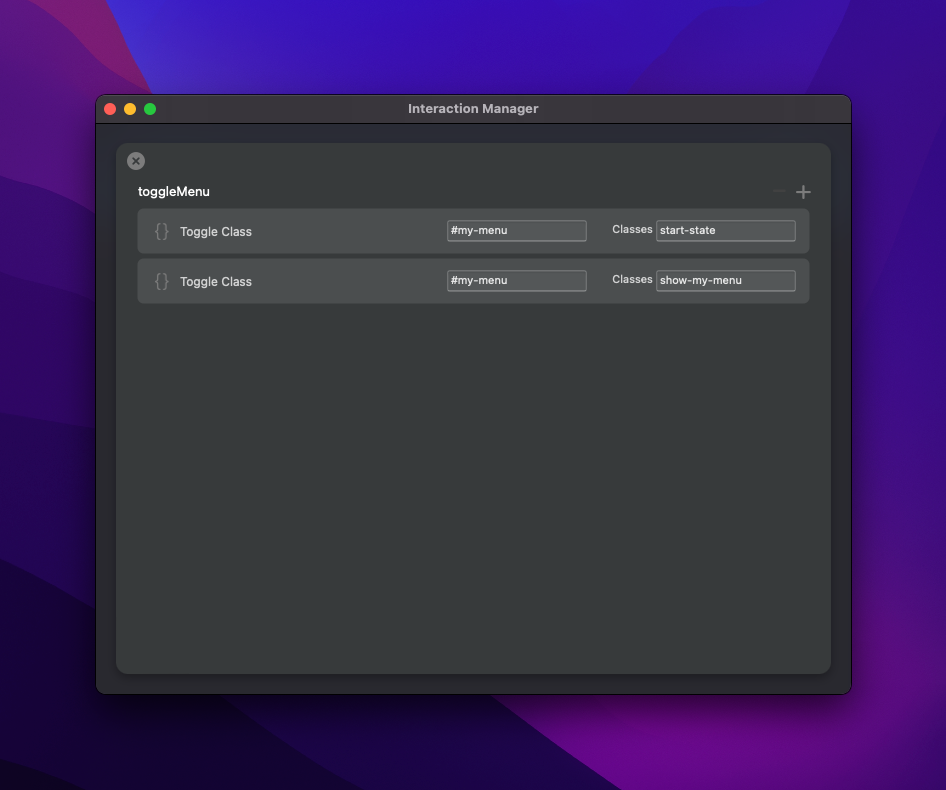
Ive added, two Toggle Class interactions. First one is for the start state-class and next is for show-my-menu class. Both have #my-menu which is a reference to the ID name of our Div-container which we added in a previous step. This is basically where our menu has been created.
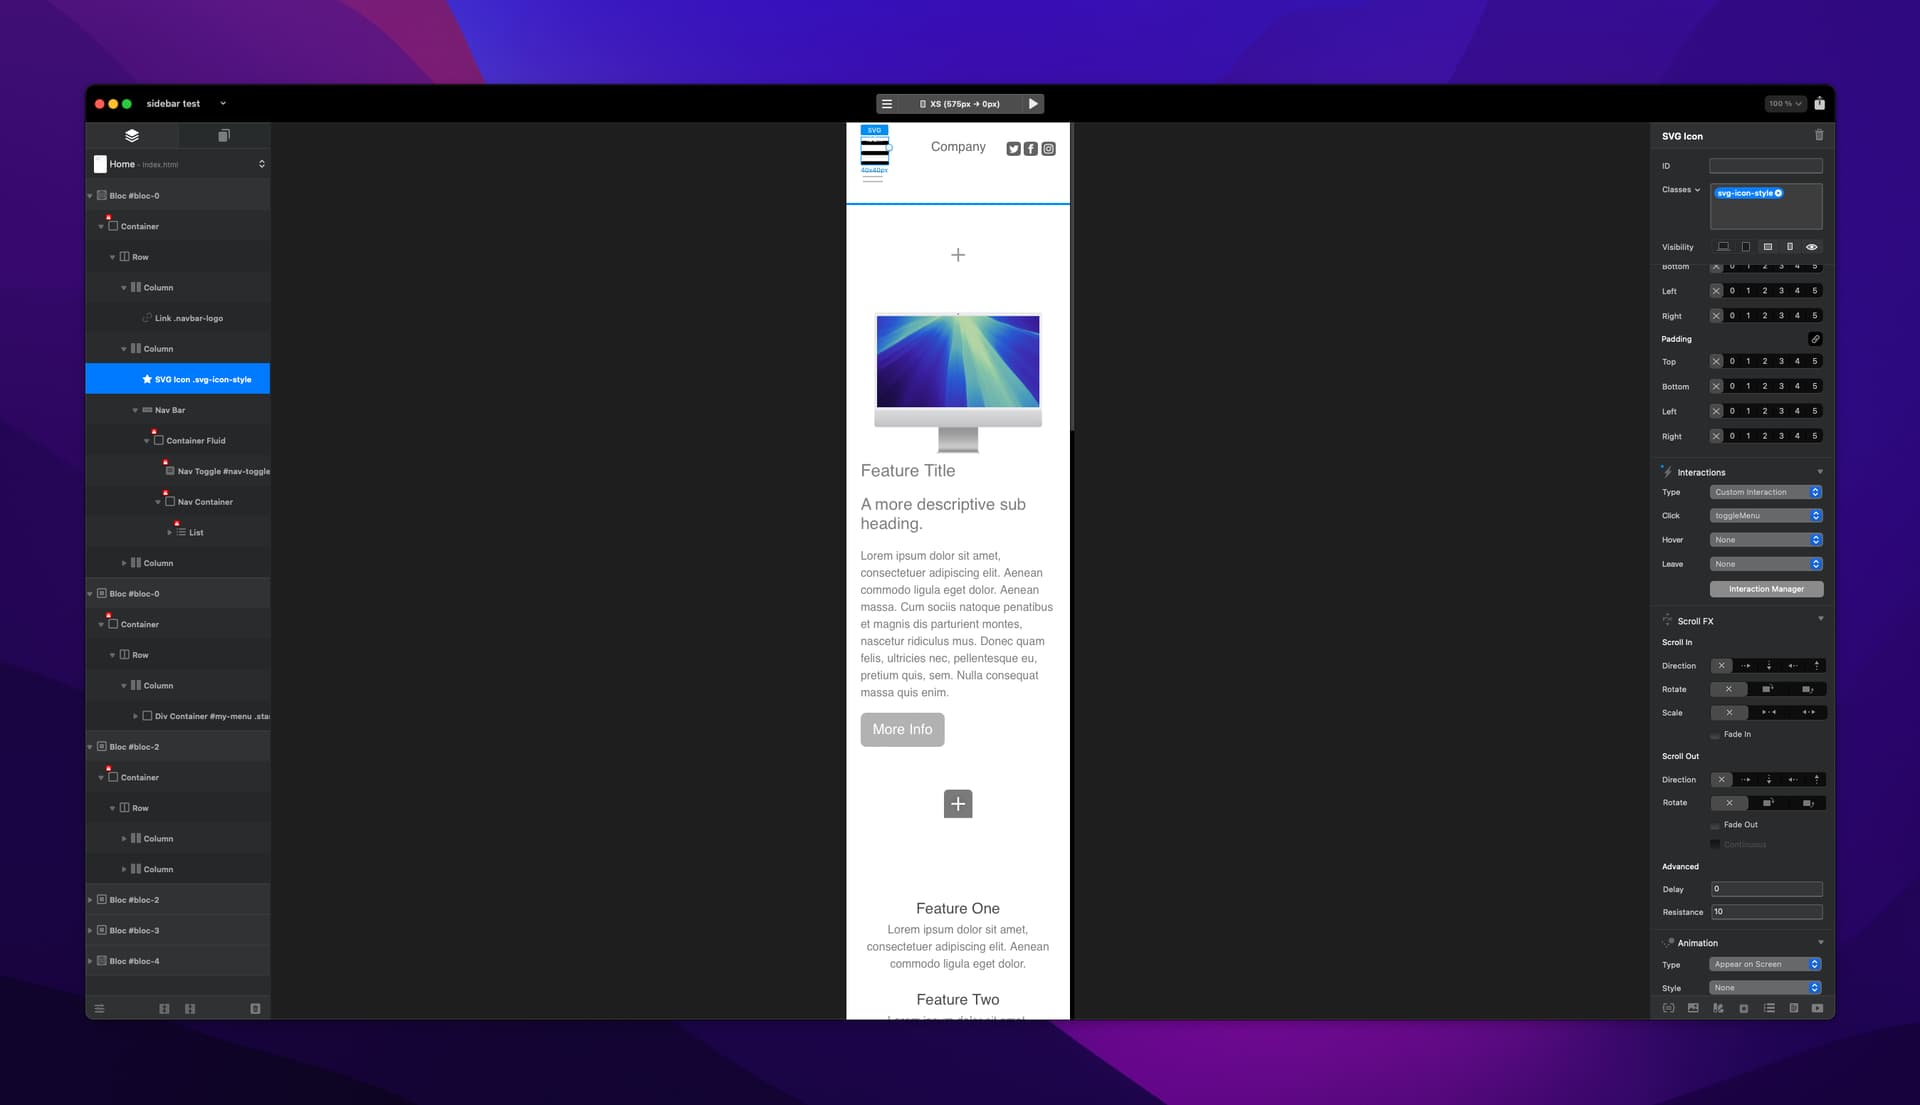
I have added a hamburger icon and made it only viewable on the mobile sizes. The default hamburger icon that is added using the menu manager, will not work to do this as its preprogrammed and will just confuse things, so I’ve hidden this one from all breakpoints and will just be working with the Icon i’ve added.

In the interactions menu on the right hand side for my icon, I have added a custom interaction and a click interaction and selected my Interaction we just created in the Interaction Manager called ‘toggleMenu’. This means when the hamburger icon is clicked, and interaction will take place, which for us is opening and closing a menu.
This should have a menu now flying in and out. I have added a class to the list element in our div container to align the menu items, as they are too close to the the edges. I called this class align-in-menu. In the positioning section of this class i put the top positioning to 100px and set the positioning to absolute, so that the menu items aren’t too close to the edges.

To cover the list items text colour, I have added a class in the class manager called ‘align-in-menu a’ and chose to keep the spaces in tact. In this class I changed the colour of my text and size.
I added a second class called ‘dropdown-menu’ this will edit the appearance of the secondary menu (its currently white and linked to the nav item ‘Course’) I added the background colour, the same as my fly in menu, but you can choose whatever suits you.
There maybe better ways to achieve some of the things I’ve mentioned in this example, by all means experiment and let me know.
4 Likes
Superbe but please can you add a padding-left for the menu ! ![]()
![]()
2 Likes
Good Point, It really needs some!
Phew! ![]() …
…
1 Like
changed the animation for a different effect.
4 Likes
Talk about playing in the sandbox and showing us all what you’ve accomplished is so kind of you. ![]()
2 Likes
This is great @AdamNotEve thanks for sharing ![]()
1 Like
Good job.
You can use viewport units such as 100vw instead of the fixed 1000px for the CSS translateX value to ensure that it’s outside all browsers viewable area. Some people could still see it otherwise if you use the fixed pixels (1000px).
2 Likes
Hi @Norm on your remove video background in the custom Interactions is Stop Interaction command, I can’t find it on the list, could you tell me where it is? I imagine it is hiding in plain sight to me ![]() Thanks
Thanks
Thanks for that.
Its there but you need Blocs 6.1
1 Like