![]()
![]() Hey there, you awesome people! You asked, and we listened! Whoop Whoop
Hey there, you awesome people! You asked, and we listened! Whoop Whoop ![]()
This Sunday’s Skill Booster is all about crafting snazzy ![]() email templates for Blocs
email templates for Blocs ![]() . Perfect for those ‘Advanced beginners’ and beyond! But hey, Novices, don’t worry
. Perfect for those ‘Advanced beginners’ and beyond! But hey, Novices, don’t worry ![]() ! Just follow the steps closely, and you’ll be on your way too!
! Just follow the steps closely, and you’ll be on your way too! ![]()
Could we be lucky enough to see this feature in the next Blocs beta, @Norm? ![]()
![]()
![]() You’ve proven you can do it in 5 days
You’ve proven you can do it in 5 days ![]()
![]()
![]()
Enough chit-chat, let’s dive into the fun stuff! ![]() Allez on y va:
Allez on y va:
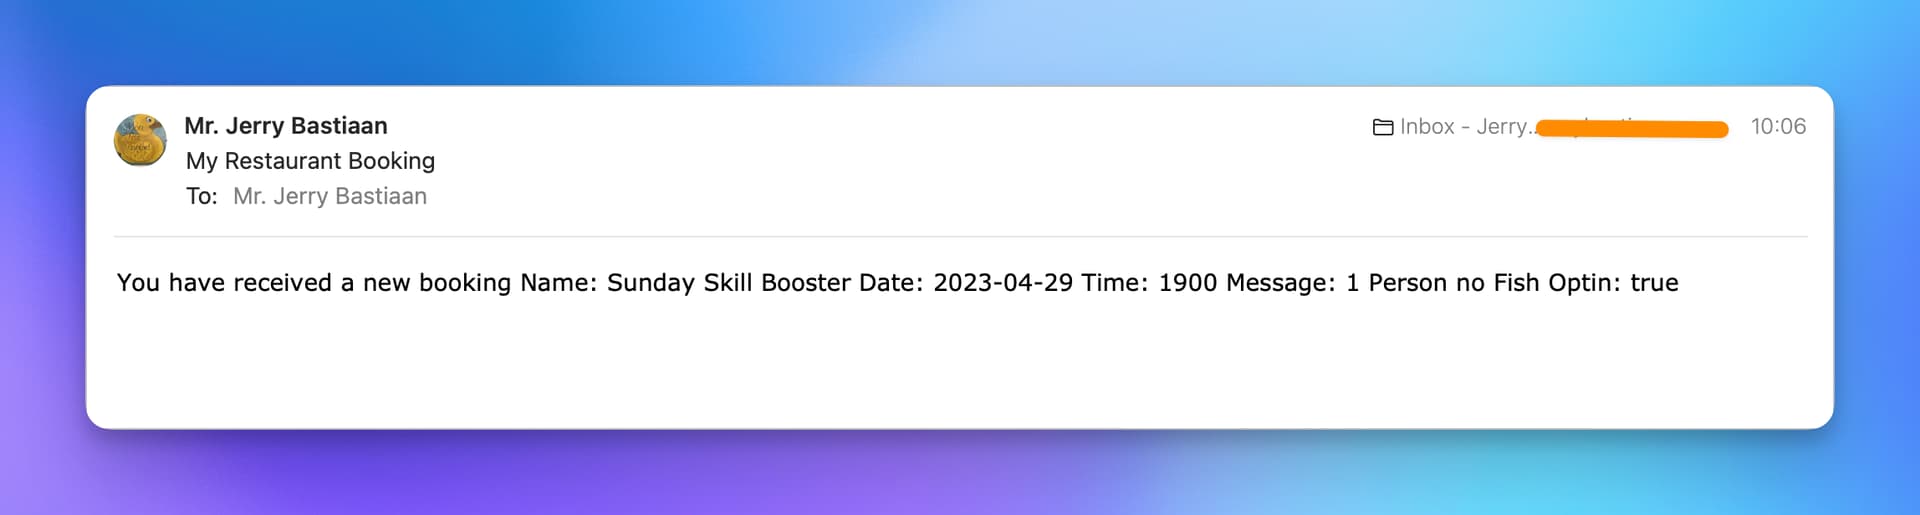
When receiving an email we don’t want to see this anymore😠:
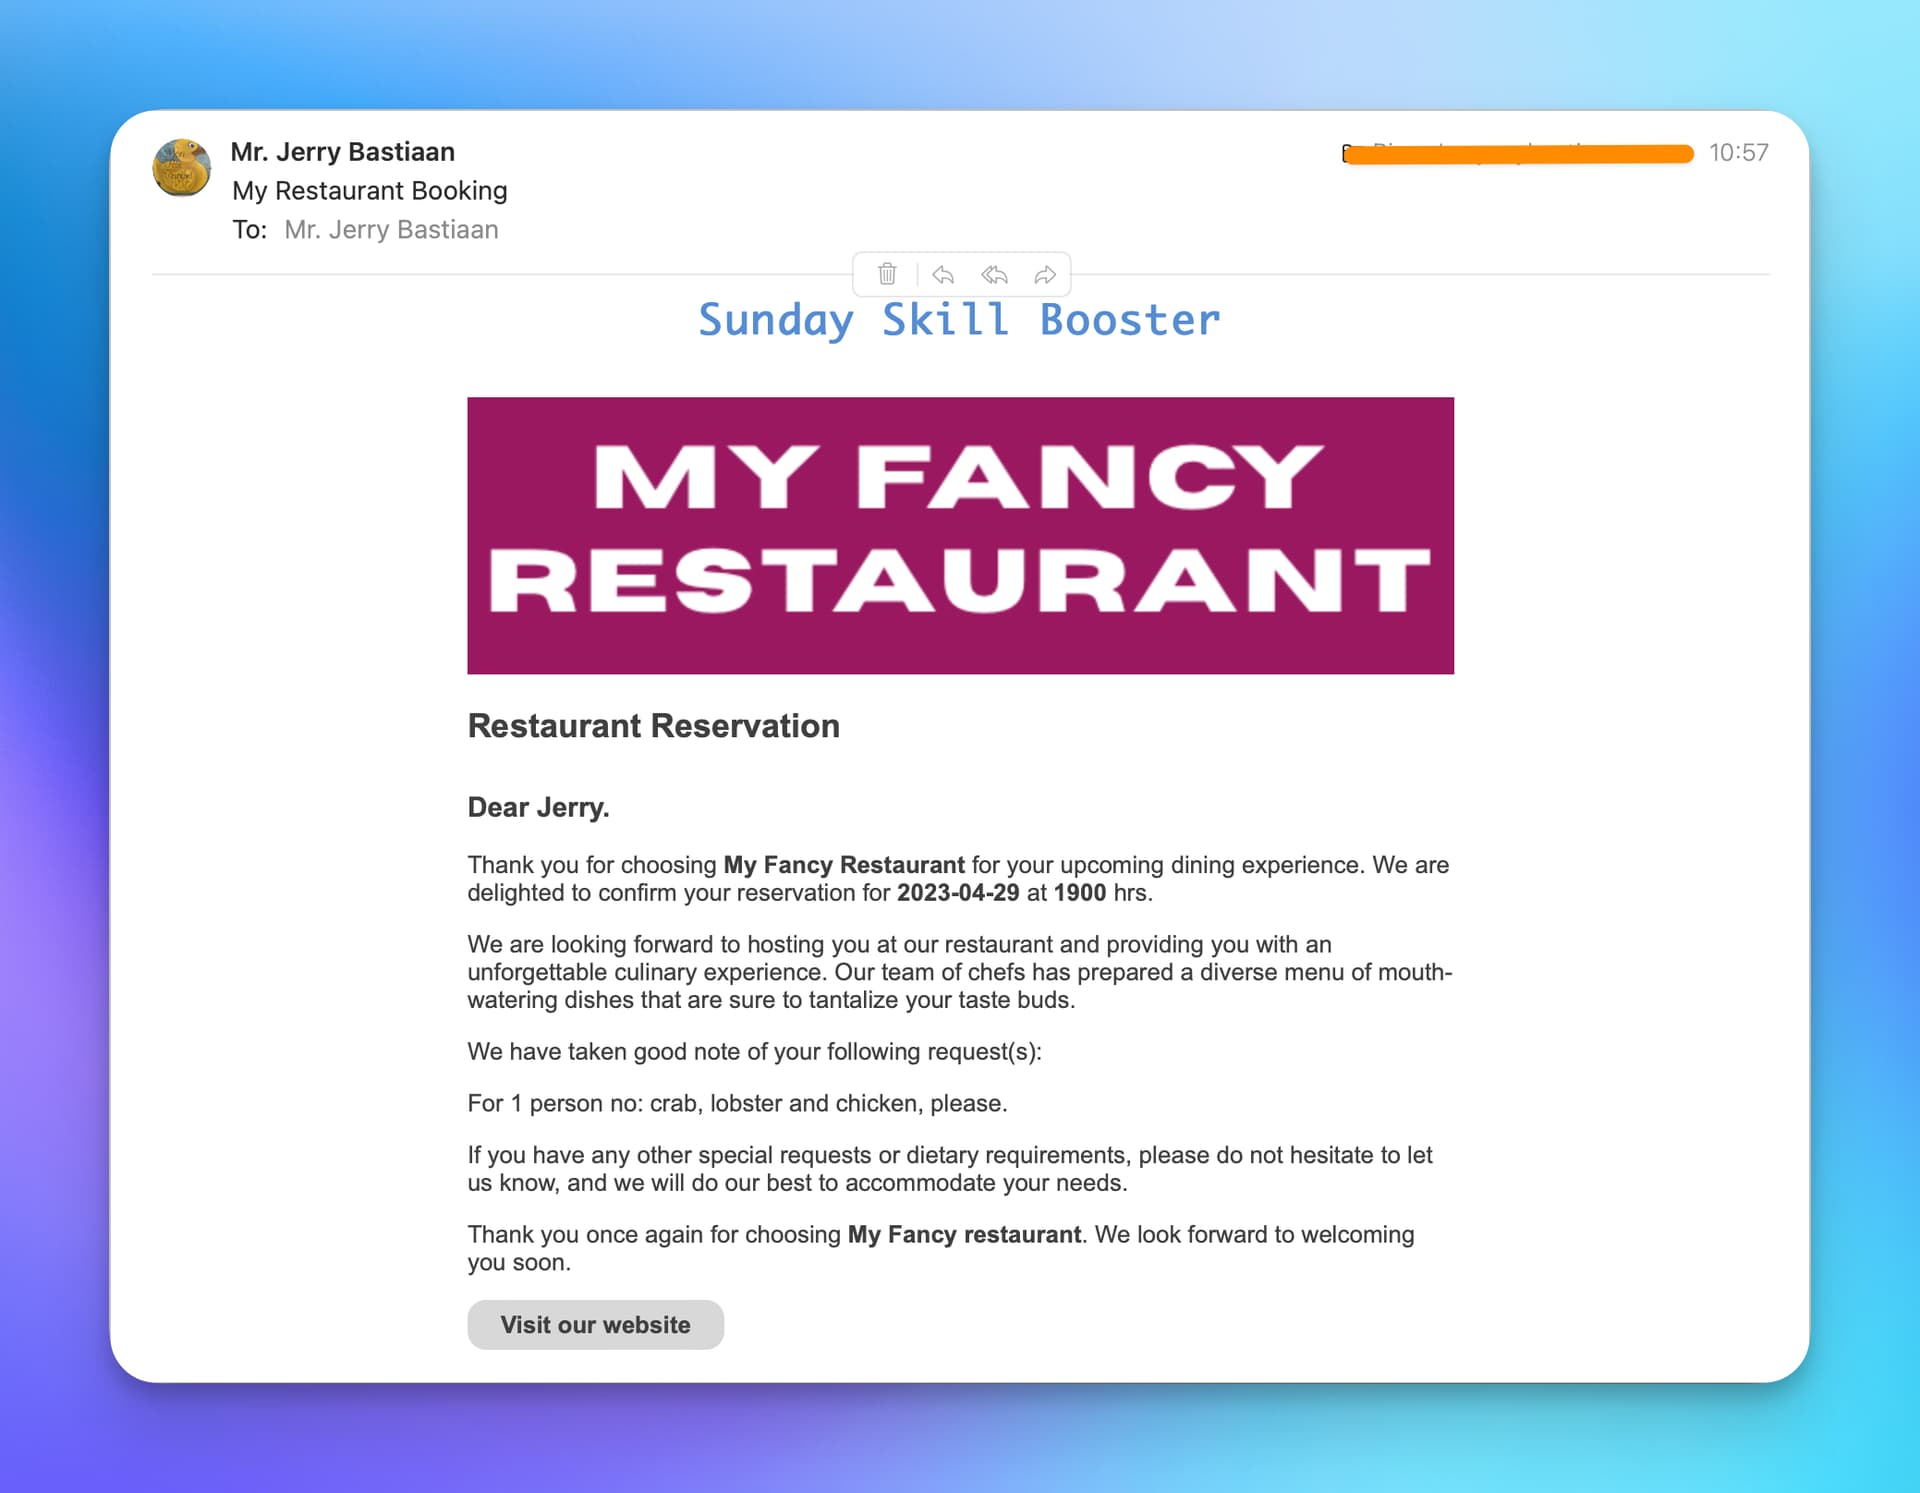
But instead, we want this ![]()
![]() :
:
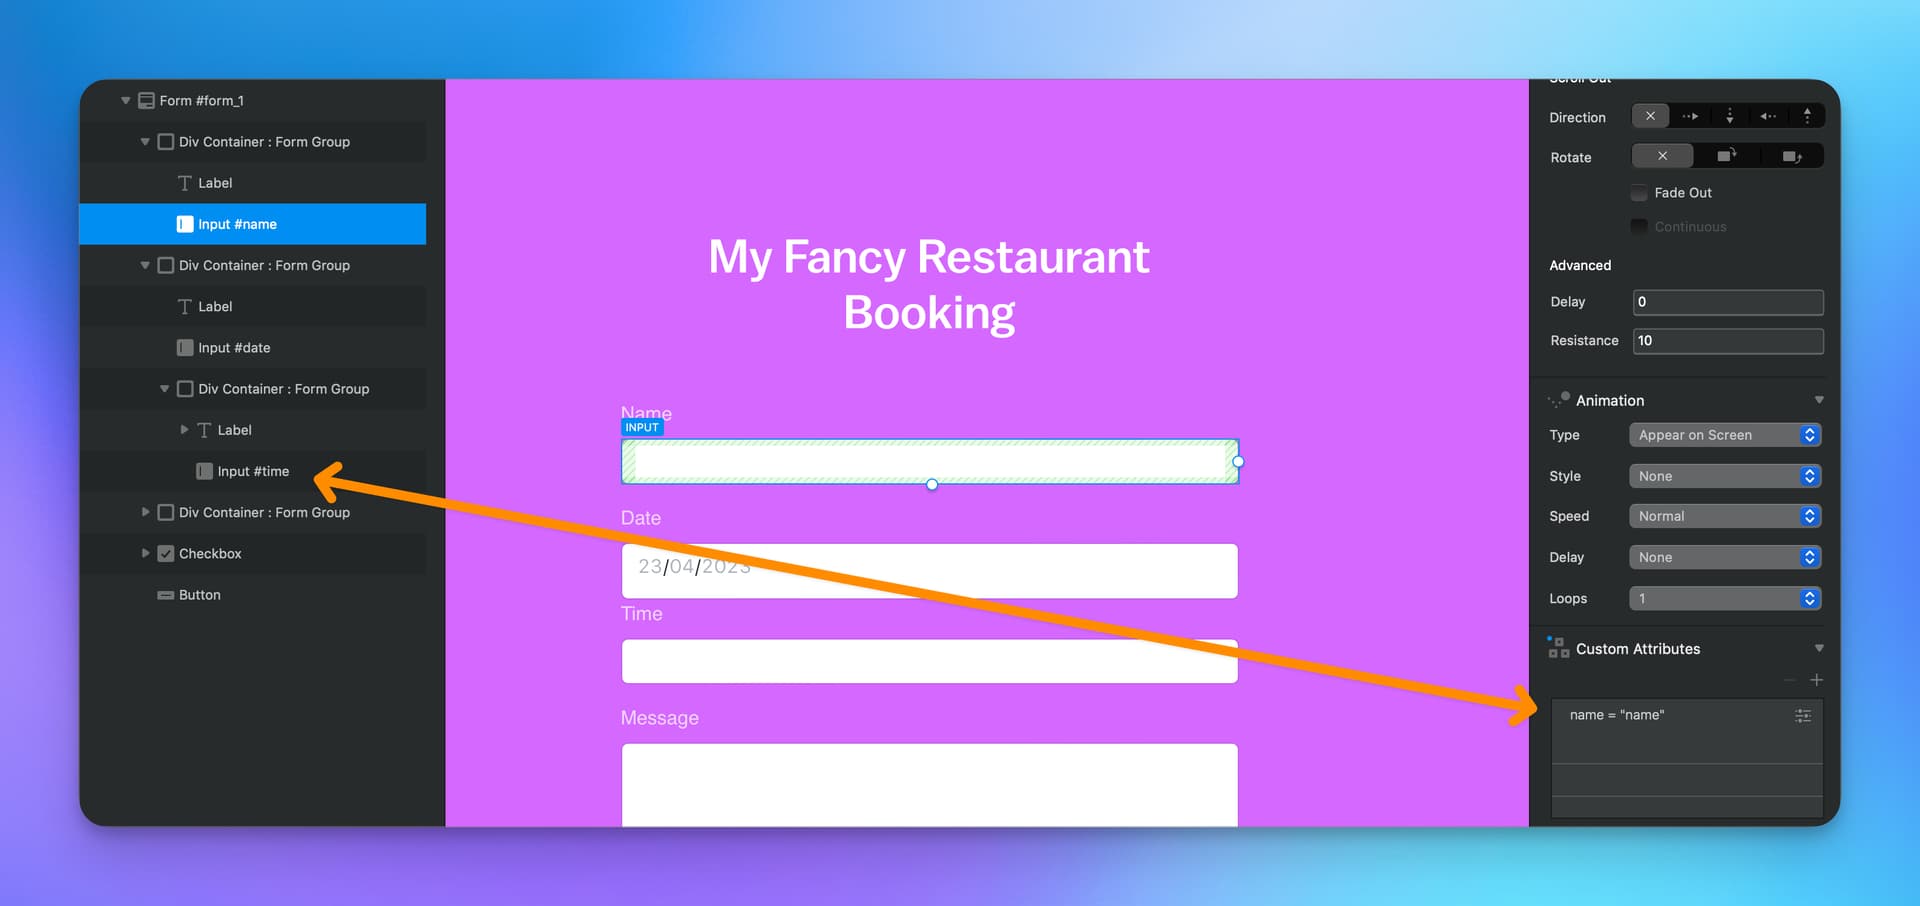
1. Let’s start with creating a form in Blocs. Make sure you will be using the new fancy SMTP mailer for this. (5.1 Beta only for now!)
You might want to write down the form name in case you have multiple forms on your website! In this example, the form is called: form_1.
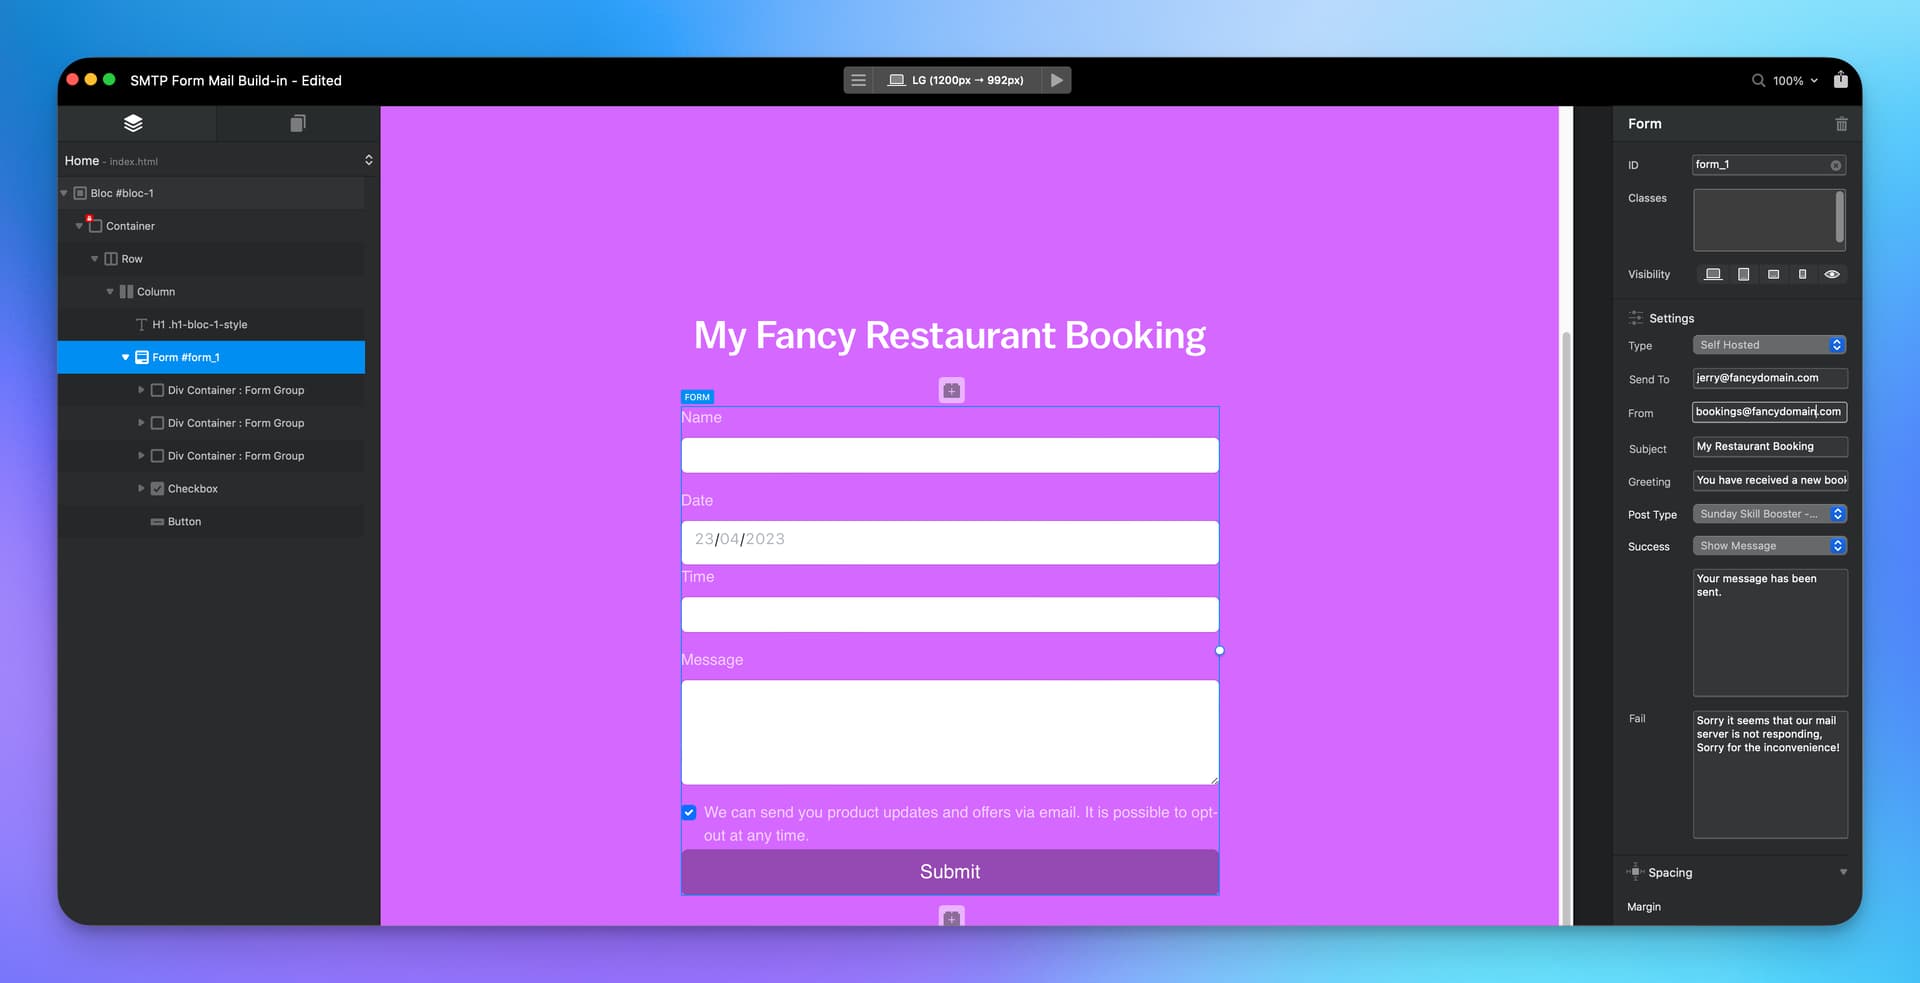
Important: Make sure each input element has its name set as a custom attribute:
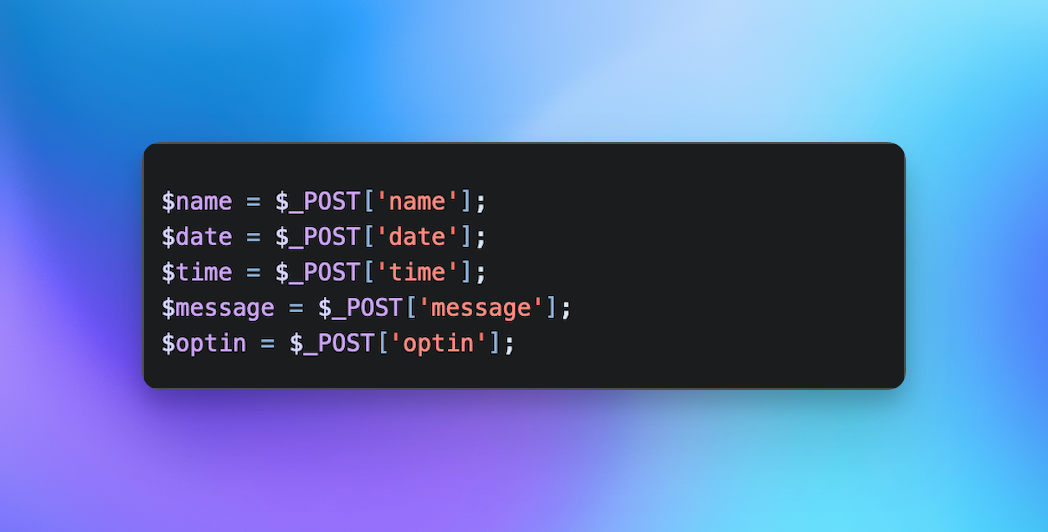
2. When ready, export the website and navigate to its location. Inside the folder, there’s another folder called: includes. This folder contains your form. Open the form with Apple’s text editor or use a code editor.
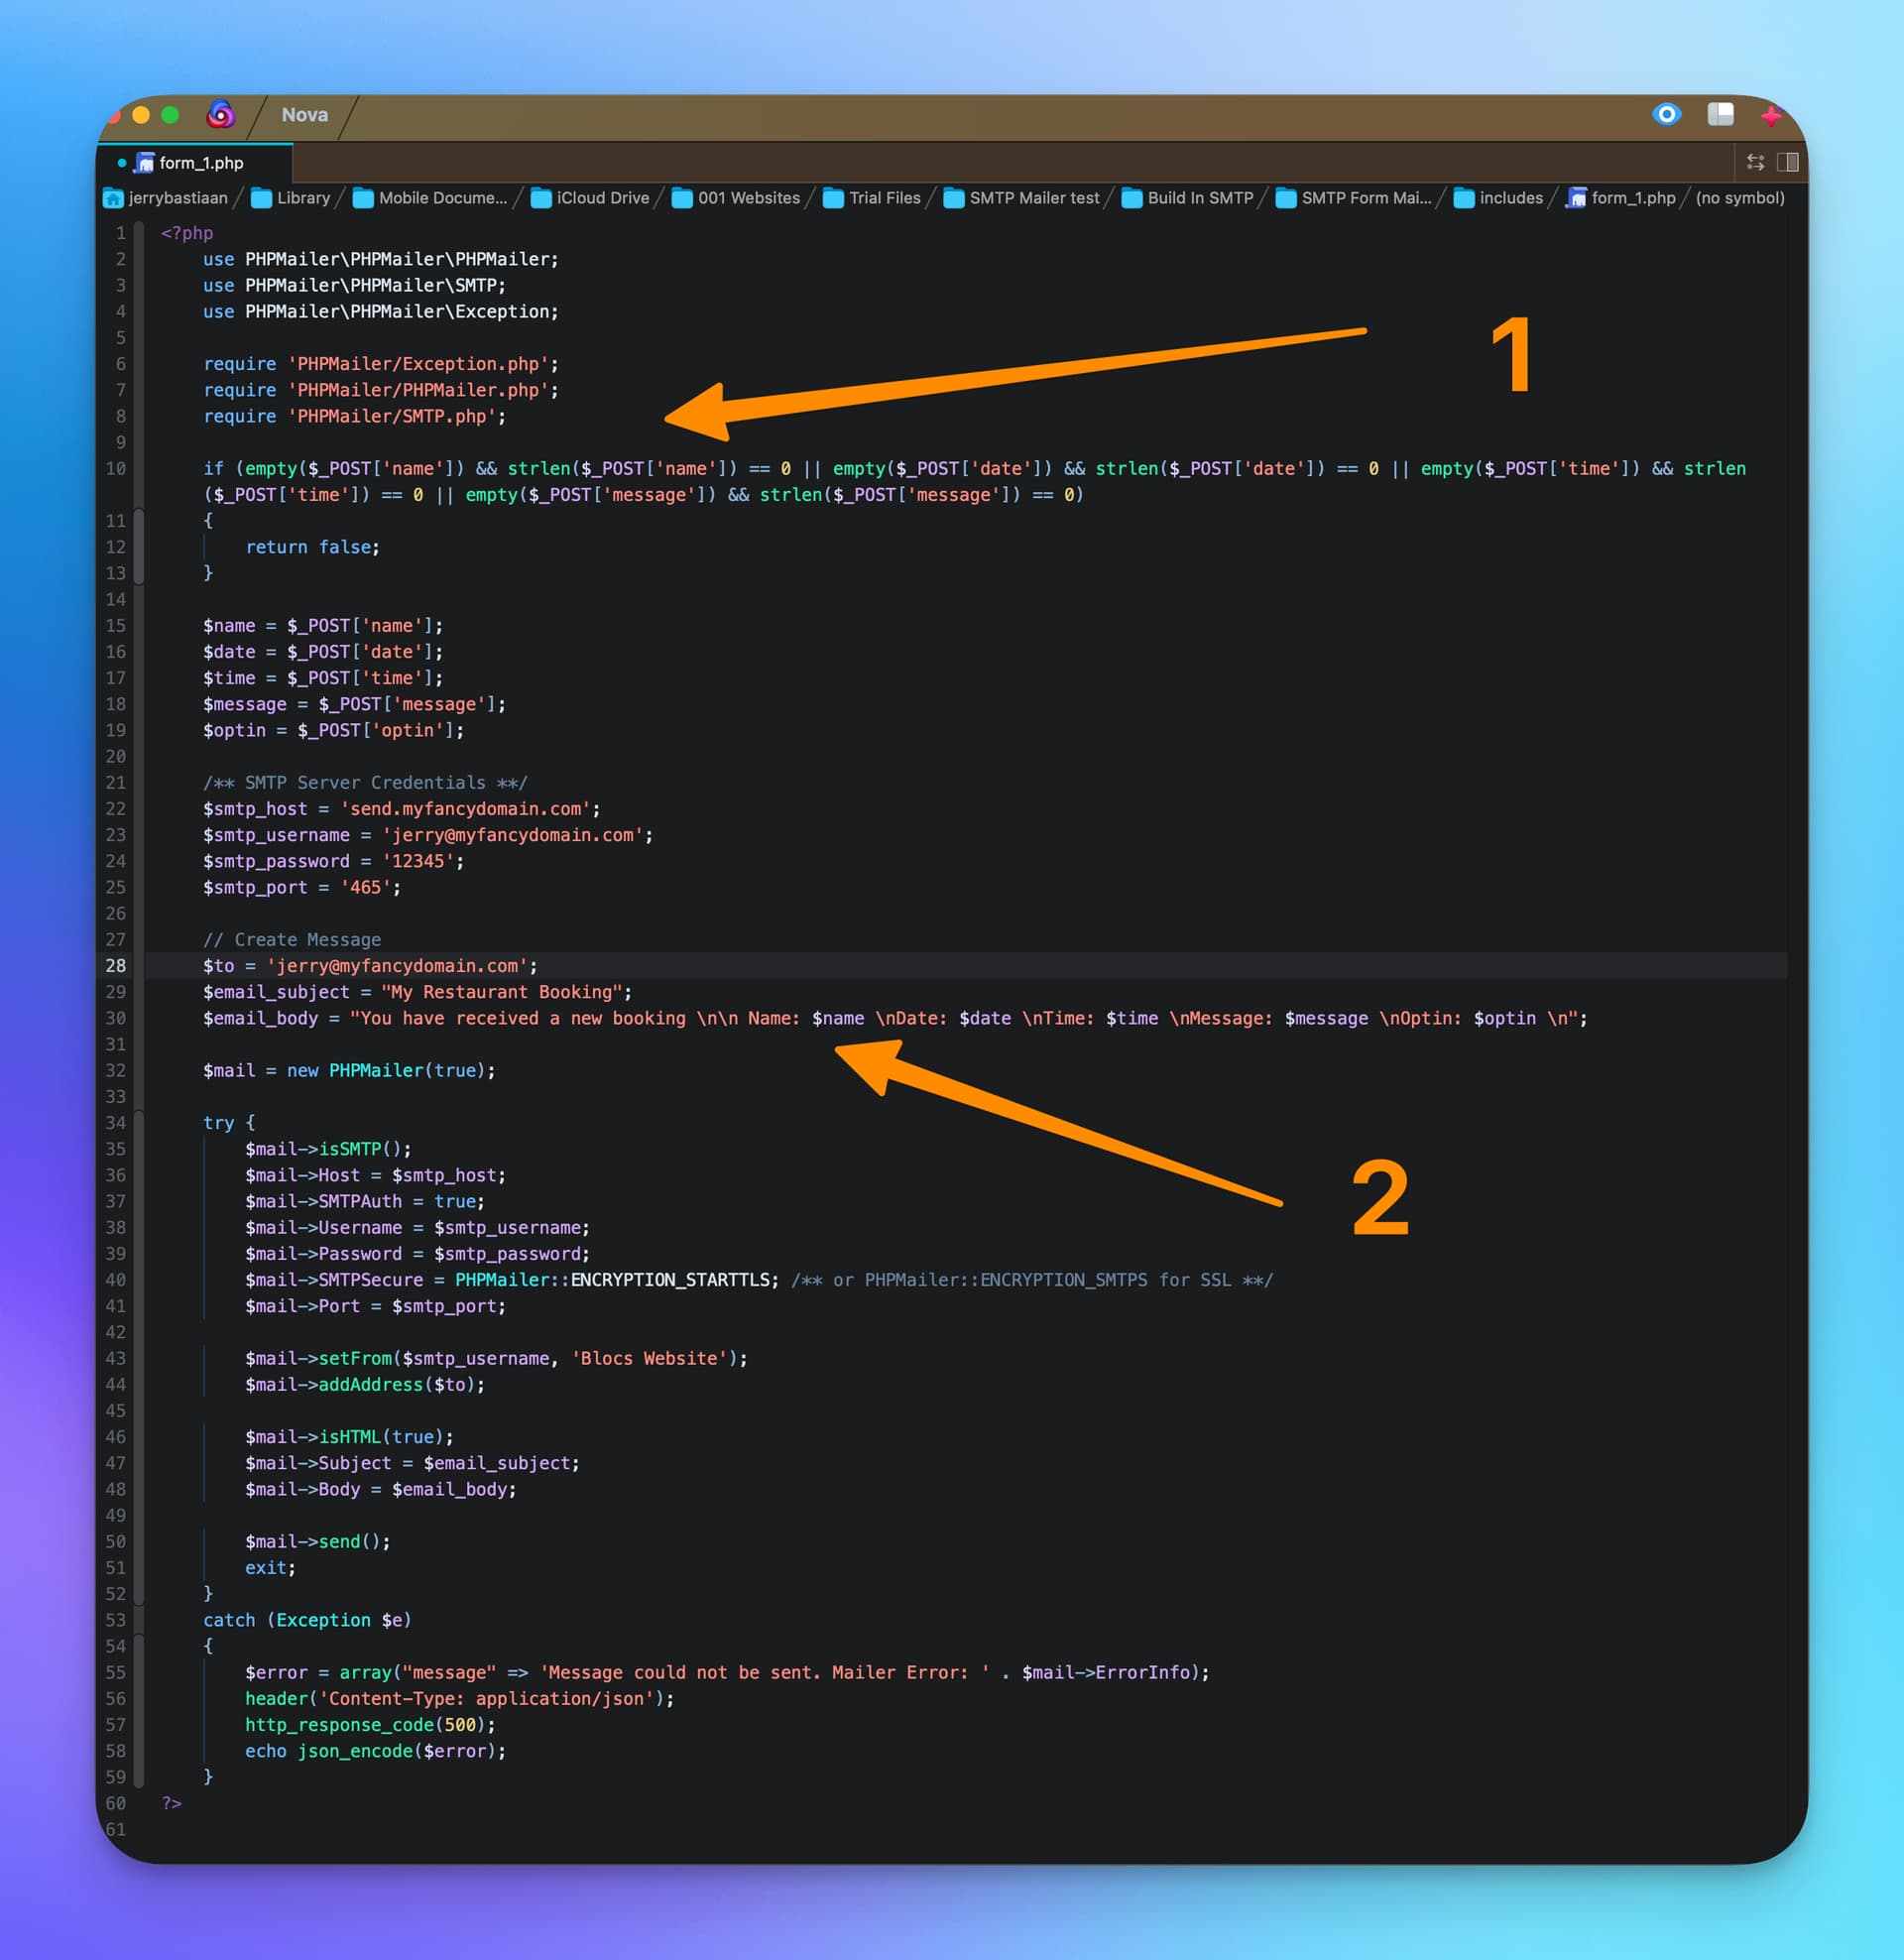
3. You will find something like below just above the “Server Credentials”
Write down the field names you have created (name, date, time etc) we will need this when creating the email template.
4. Now we’re going to create the email template. I’ve used for this template the open-source email template builder Mosaico as it features a handy drag-and-drop builder. However, using Bootstrap Email would make more sense but requires an understanding of the Bootstrap framework.
5. Create your fancy email template. Add the field names in between double braces {{name}} where you want to populate them.
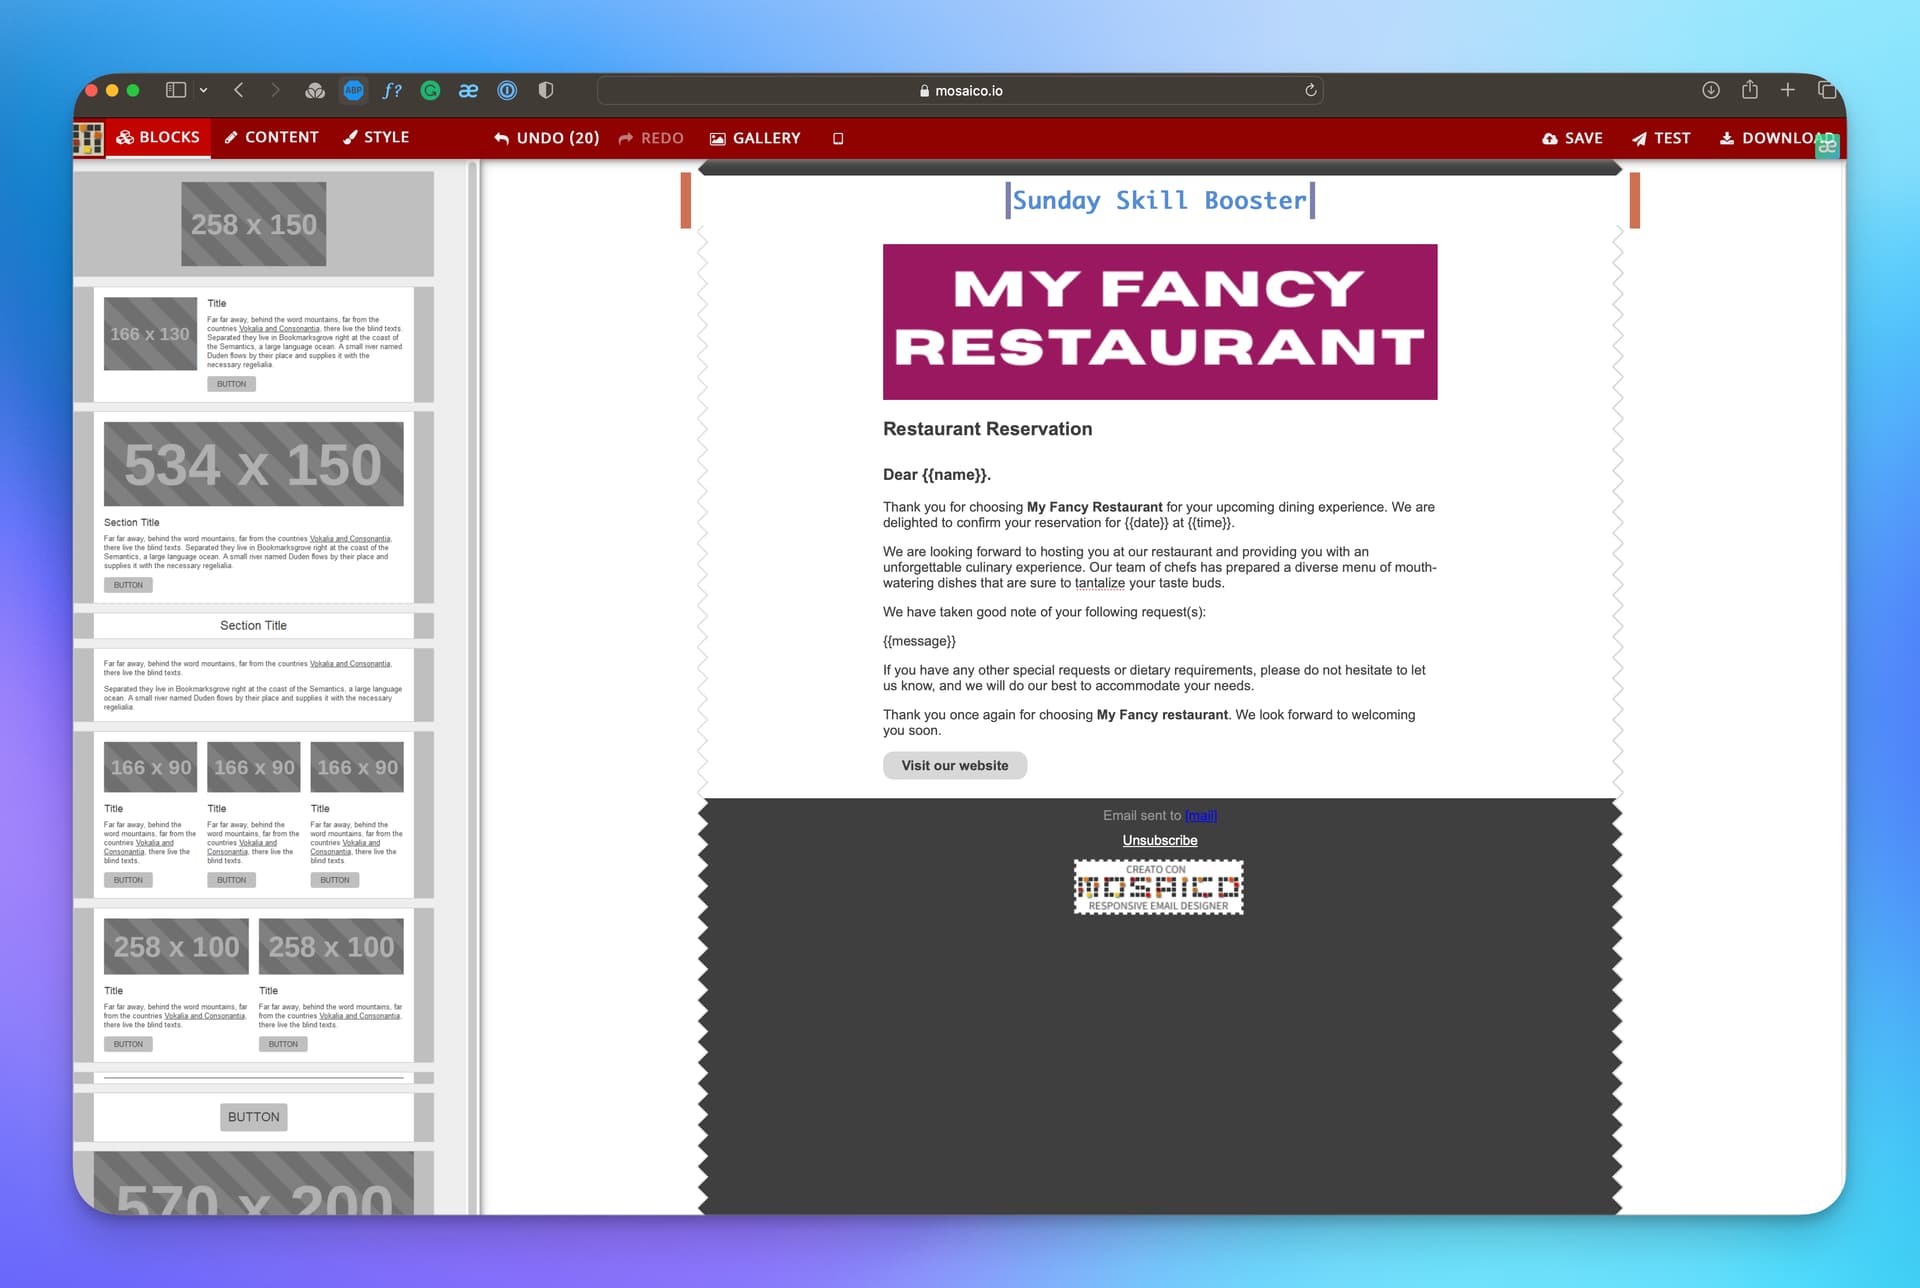
Test your template and when done download it. Rename your template to: email-template.html as this is the name we will be using.
6. Add the email template you just created to the "includes’ folder:
7. Let’s begin with the challenging part ![]()
![]() !
!
Open the form_1.php again. We’re going to modify this now so it will call the email template and populates all fields correctly.
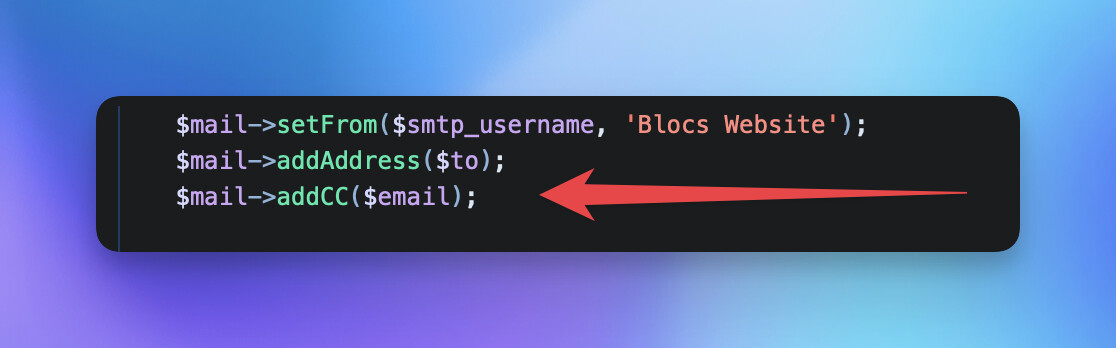
Before the ‘if’ statement we will need to tell the form to use our template. and;
We will need to remove the original message and replace it with the name fields which it has to populate in the template.
7a. Add the following before the ‘if’ statement:
function loadTemplate($templateFile) {
		$templatePath = $_SERVER['DOCUMENT_ROOT'] . '/includes/' . $templateFile;
		return file_exists($templatePath) ? file_get_contents($templatePath) : false;
	}
7b. Replace:
$to = 'jerry@fancydomain.com';
	$email_subject = "My Restaurant Booking";
	$email_body = "You have received a new booking \n\n Name: $name \nDate: $date \nTime: $time \nMessage: $message \nOptin: $optin \n";
With:
$to = 'jerry@fancydomain.com';
	$email_subject = "My Restaurant Booking";
	$email_template = loadTemplate('email-template.html');
	if (!$email_template) {

	}

	$email_body = str_replace(
		['{{name}}', '{{date}}', '{{time}}', '{{message}}', '{{optin}}'],
		[$name, $date, $time, $message, $optin],
		$email_template
	);
8. Save your amended form_1.php file and upload it all to your server. Tip of the day: You might want to keep a copy just in case you mess up uploading later. ![]()
If all is done correctly the outcome should be something like this:
![]()
![]() Woo-hoo! We’ve reached the end of this fantastic tutorial, folks!
Woo-hoo! We’ve reached the end of this fantastic tutorial, folks! ![]()
We hope you had a blast ![]() creating those fabulous
creating those fabulous ![]() email templates for Blocs! As ‘Advanced beginners’ and up, you’ve now got a shiny new skill in your toolbox
email templates for Blocs! As ‘Advanced beginners’ and up, you’ve now got a shiny new skill in your toolbox ![]() . And Novices, kudos for keeping up!
. And Novices, kudos for keeping up! ![]()
![]()
Feel free to share your marvellous creations with anyone.![]()
![]()
Until the next thrilling Sunday Skill Booster Tutorial, happy designing, and keep the creativity flowing! ![]()
![]()
UPDATE:
There’s no need to set the custom attribute. My original post used the name field to pull the data. As @Norm is much smarter than I ![]() he uses the ID field:grin:.
he uses the ID field:grin:.