Today I have a new Custom Interaction experiment to share with you, requests for image maps have come up a bunch of times on the forum and I thought @SpookyDoo’s recent how to guide on how to create one was brilliant. I wanted to see if I could improve on his concept and add a little more polish ![]()

The Structure ![]()
The image map is built inside of a Stack Container Div, with an additional class added to set the main container position relative (we need this in order to keep those points of interest positioned well across breakpoints).
As you can see, the main image is at the back (purple), then the points of interest (SVG Icons - Dark Blue) and finally an additional div that contains our info overlay (green).

Like @SpookyDoo did in his example, I’m also using SVG Icons for the points of interest. Because we are using a Stack Container, all of our points of interest are automatically layered on top of the main image, however I have also set their position to absolute so that I can position them with percentages.
Here is an example of one of the classes used to position a point of interest. These can also be tweaked for each breakpoint if required.

The final part of the structure is the information overlay, this is a div container (#info-overlay) with a heading (#info-title) and paragraph (#info-desc) placed inside. Notice that the information overlay div container, heading and paragraph all have #ID’s applied, we need these in order to control this part of the UI from our interaction.
Styling ![]()
I wont get into the weeds on the custom classes, but initially I have the info overlays opacity set to 0 so it is hidden, the custom interaction will apply a class (show-info) to make it appear (opacity: 1). So watch out for that when you play around with the experiment file.
Data Attributes ![]()
I’m going to give each point of interest a data attribute for the title and description. Later on I’ll pull these into my custom interaction using the data() short code to populate the info popover text for each point.

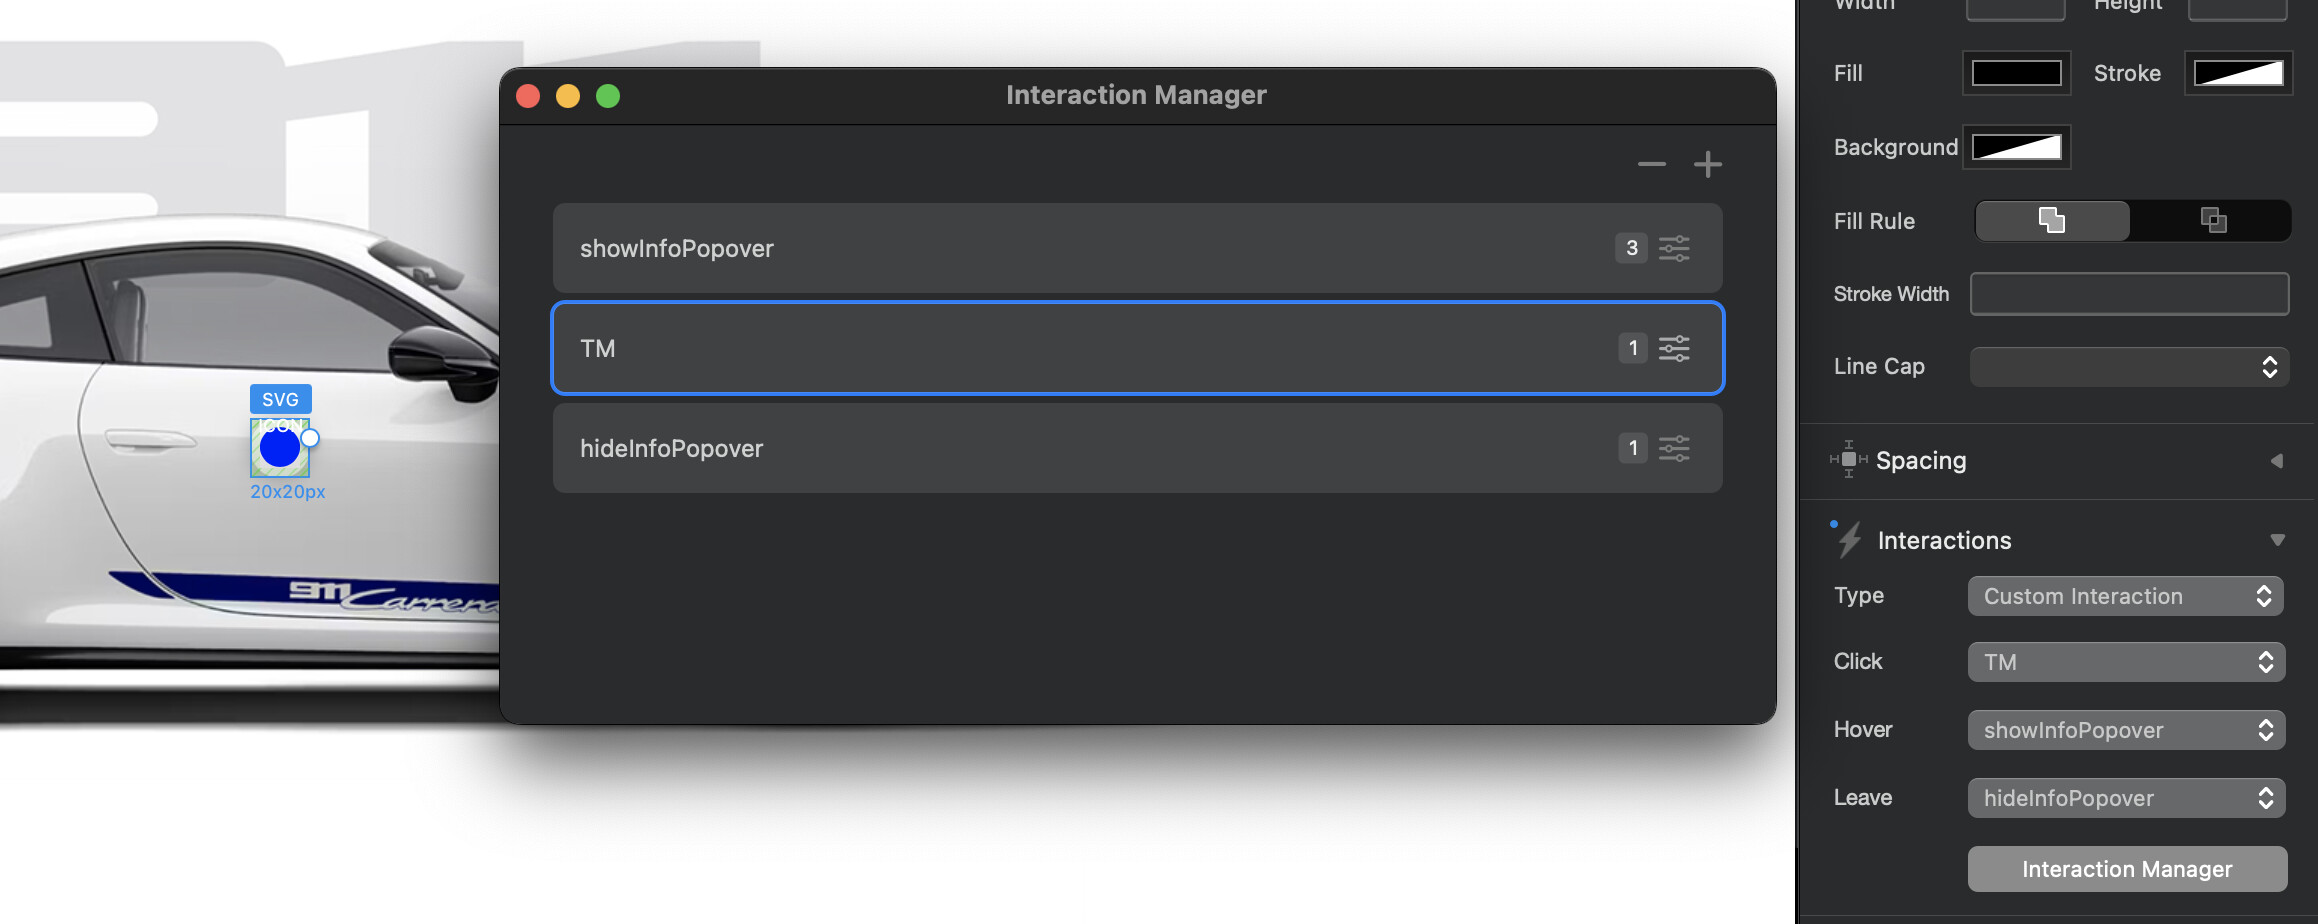
Custom Interactions ![]()
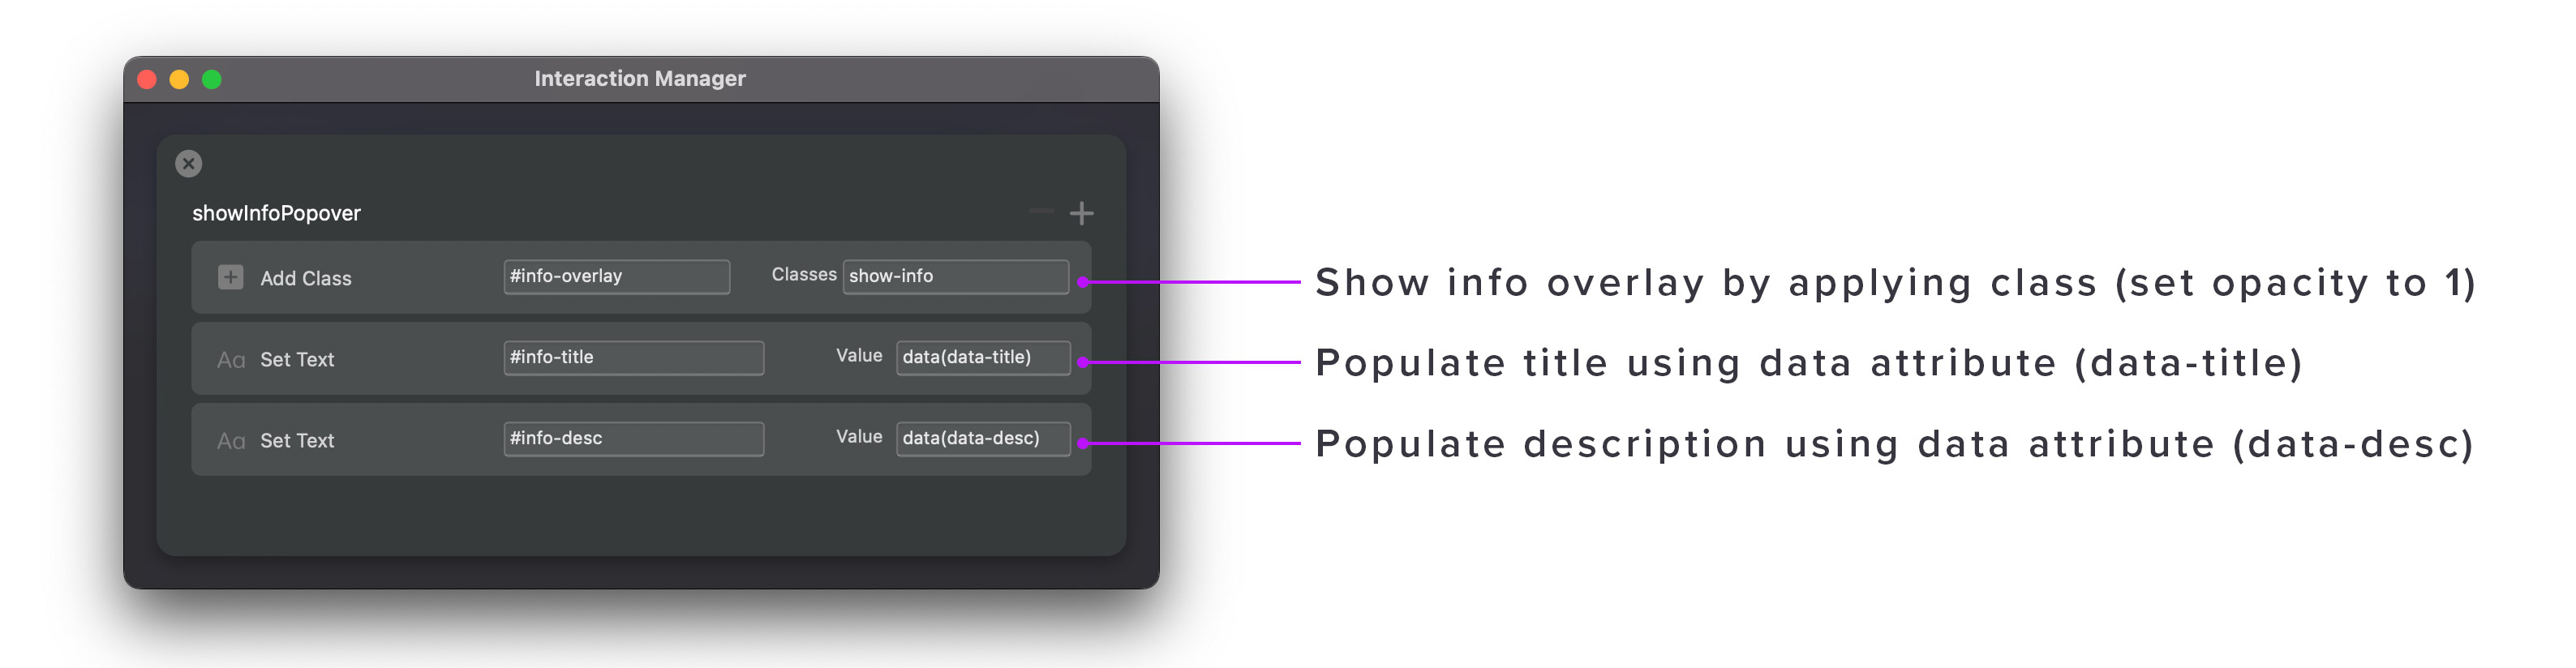
I use two custom interactions to power this image map. The first interaction is responsible for showing the info popover (Add Class rule) and setting the title and description (Set Text rule).
The second interaction will be used to hide the info popover, this one is pretty simple, we just remove the show-info class, which causes it’s opacity to return to 0.

Finally I hook up the interaction triggers to each point of interest. Notice that the showInfoPopover is triggered on Click and Hover, this is important for mobile, as hover events are not triggered on touch screens that don’t have a pointer device connected.
The hideInfoPopover interaction is triggered when the mouse leaves a point of interest. On mobile, this will trigger when a user touches the screen outside of the point of interest.

And thats it, you can now create your own custom built image maps using Stacked Containers, Custom Classes and Interactions.
Another job done without pasting in custom code. #BlocsRocks #NoCode ![]()
![]()
Download Image Map Experiment (394.9 KB) - (Requires Blocs 6.2)
![]()